Showing posts with label #cardmaking. Show all posts

Wednesday, 17 June 2020

Versatility of Mandala stamps and stencils


Hello, and welcome back to the Lisa Horton Craft blog, Claire Newcombe with you today.

Today I'm sharing with you my projects from each of my FB live events throughout the month of June so, plus the first look at a card scheduled for 23rd June.
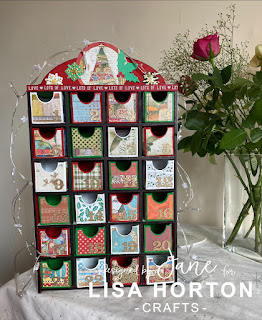
Each of the projects in the photo above have been made with the June challenge theme in mind, and will be sent to the winner of June challenge which is 'SETS of THREE'

The theme can be interpreted in any way you choose, whether it be adding three elements on your project, or maybe making three ATC's, a set of three co-ordinating projects....your choice, have some fun with it.


There is another way in which all the projects made are linked, and that is that they all feature the fabulous Mandala collection of stamps and stencils....all of which are now available from Lisa's website

I wanted to create a selection of very different projects, demonstrating just how versatile the Mandala designs can be and how well they slot into Lisa's whole repertoire of products.

ALL FB LIVES FROM DESIGN MEMBERS CAN BE FOUND ON OUR NEW YOUTUBE CHANNEL, FOLLOW THE LINK TO SUBSCRIBE

I have attached the Youtube links for the projects that I have already created, if you would like to make them yourself.

1. Facebook Live 2nd June (YouTube https://www.youtube.com/watch?v=QeED11ESUOo)
I have created a set of three ATC's (artist trading cards) in a very feminine style. The mandala stencils feature in the background as a beautiful backdrop for the A5 Foliage stamps.
You will see on the middle card the mandala pattern has been clear embossed as a design feature. 


----------------------------

2. Facebook live 9th June (YouTube https://www.youtube.com/watch?v=qBKU7Y0AhGE&t=498s)
These cards show the beauty of the Mandala stamps themselves, and the fun you can have colouring them.
But also how they can be used to create subtle backgrounds, when stamped with clear embossing ink onto coloured card for a tone on tone effect.


------------------------------

3. Facebook live 16th June (YouTube https://youtu.be/2XeqCWhlb2Q)
The mandala stencils are layered here in the background with Lisa Hortons Woodgrain background stamp, and Mandala stamps highlighted with mica powder.
It is important to show that all products released into the Lisa Horton range will be able to mix and match with each other.


----------------------

4. Facebook live scheduled for 23rd June
This project uses the mandala stencils in a more familiar way, layered up to show their beauty. I have used the circle stencils with. distress ink to create a background. The  'grungy' details have been added using Lisa's A6 Texture stamps.
I hope you can join me next week when i demo this on a FB live 


Thank you so much for stopping by, I hope this has made you smile today.
Remember we have a lovely Facebook group where we'd love for you to share all your makes with Lisa products, I'll pop the link just here


Take care of yourselves x

Monday, 15 June 2020

Poinsettias

Hello everyone.

Sharing a Christmas card with poinsettias flowers from Lisa's new Christmas stamps.


The card is measuring slightly smaller then A5 size card.
Christmas Flowers artwork stamps,
Stencil coming soon,
Stitched scalloped circles dies,
Black  micro glitter,
Sticky sheets,
Pearls 
Markers to colour the image.

I embossed white A5 size card using a stencil, then cut at both ends 1.5 cm at the top and bottom of  embossed card. Using sticky sheets on black card I applied black micro glitter and cut to strips. Glued the strips to both ends of embossed card and then glued to the base card. 
I used sticky sheets on black card and cut a circle using two circle dies, the I applied black glitter to the circle frame and glued to the center of card.
Coloured the poinsettias flowers with alcohol markers, fussy cut out and shaped the flowers before gluing them to the card.
Cut out the sentiments and framed them with black card, added to the card with foam pads for dimensions.
Added little yellow pearls to the center of poinsettias and some corner of the card.


Most of Lisa Horton crafts products you can find on That Craft Place
If you can't find them on Lisa's website then please try Create and Craft

Hope you are all well and staying safe.

Thank you for looking and leaving your comments.
Have a wonderful day and happy crafting.
Hugs Natalia.

Thursday, 11 June 2020

Christmas In June

Lisa Horton Crafts - Christmas in June

Hi everyone, Jane here!

We’ve almost reached that time again, and I know Lisa and the design team are so excited for her next live shows on Create and Craft.
The live shows can be found online here, or watch on the following:-
Sky channel 683
Freeview channel 95
Virgin channel 748
Freesat channel 813
Apple Tv
Amazon Fire
I tend to watch online on my tablet while crafting 😉

The Christmas shows have already started and tomorrow it’s our Lisa’s turn, and she will be bringing you a huge range of seasonal goodies to get you into the Christmas mood.

We have MDF advent calendars, paper pads, stamps, more mermaid tails and sooooo much more, so be sure to tune in at either 7:30 am or 11:15 am or even better, catch both shows for demos and ideas.
The full range from Lisa Horton Crafts can be found here.
Don’t worry, if you miss both shows, they can be watched online on catch up. Also keep an eye on our group where links to the catch up shows will be posted.
Lisa will have some amazing demonstrations lined up, and I think I speak for the entire design team when I say, we’re all buzzing with excitement.
Two weeks after the live shows on Create and Craft, you will be able to go shopping here if you prefer.

I had so much fun building and decorating my advent calendar. I used traditional colours and the Make A Wish Christmas papers from Stamperia.

You can find more ideas for Christmas from the DT on our Pinterest board here

If you’re looking for some tips on how to use your LHC stash, you can find it all over our social media channels, all of these are listed below:-
And you can always follow all the design team on Instagram by searching #lisahortoncraftsdt where you will find all of our fabulous projects.
Take care and lots of love
Jane xoxo

Monday, 1 June 2020

Distressed Postcards


Hi everyone, welcome back to my blog post. 
Today I'm going to be using Lisa's postcard background stamp as the main focus of a pretty card which would 
be suitable for so many occasions.
You will need: 
Lisa Horton sisal
Lisa Horton Luxury Pearls - Rainbow Collection Cool Skies
Stamperia Roses and Laces paper
Distress Oxide inks (or your preference)
Paperclip and lace (optional)
Start by stamping the postcard twice onto some cream card. Holding the stamped image, tear the card edges 
towards you to reveal the core of the card on all sides. Next, use your inks to colour those edges - front and back 
as you will be curling the edges up.  Use Distress Oxides (old paper and just a touch of vintage photo) to give a
vintage feel to your project. I decided to make the postcard underneath darker with a touch of salty ocean 
Distress Ink. Curl the bottom right corners by rolling them around a pencil.
Next I used a portion of 1 sheet of Stamperia Roses and Laces paper pack. I tore the edges and inked them 
the same as the postcards. 

Mount the backing paper onto a cream card and tape the postcards on top. I added a heart shaped paperclip
(from my stash) too.
Stamp your trailing foliage and colour the leaves with ink. Use a brown pencil/pen to darken the stems and then 
cut out your images. (I stamped 2 of the smaller sections).  Slightly curl the edges of the leaves to add a more 
realistic look and then use 3d foam to attach to the edge of the postcard. Remember to only glue the leaves at 
the top if your flowers are going to sit in that area.

Take a little sisal and attach with glue in the area that your flowers will sit. Die cut your flowers - I usually cut 3 for 
each one to add dimension. Layer them up with 3d foam. I used Lisa's newest collection of hombre pearls to give 
a beautiful finishing touch to the daisies, and added a little paper lace from my stash too.

Hope you've enjoyed making this project with me. Feel free to comment on my post should you wish to do so.

Stay safe and happy crafting! 
Tina x


Saturday, 16 May 2020

It's our moments of struggle that define us...


Hello again

During these uncertain times, rainbows have been a symbol of hope and strength.  My blog post today is based upon all the vibrant colours of the rainbow and Lisa's stamps namely the "Majestic Butterflies" 

 You will also need:
1 x 5" x 7" card blank
1 x 5" x 7" piece of white card
Lisa Horton Crafts -Majestic Butterflies stamp set
Lisa Horton Crafts - Bubblewrap Stencil
Lisa Horton Crafts - In the Loop DL stamp set (Currently sold out)
Lisa Horton Crafts - black embossing powder
Embossing ink pad
Black Versafine ink pad
Coloured pens
Coloured stamp pads _ I used Distress Oxides
Lisa Horton Crafts - Wordage sentiments

How to create this card:

1.  Using embossing ink and black embossing powder - heat emboss your chosen Majestic butterfly, onto the 5" x 7" piece of white card.  Try and place at a jaunty angle in the centre of the card.


2.    For this particular card you are using the stencil as the main design.  Take the Bubblewrap stencil and place it centrally over the butterfly image. Seal it down carefully so that there is no risk of movement. Gather together your inks which cover all the colours of the rainbow.  I added mine with egg blending tools.


3.  Work from one side of the stencil to the other and add the stripes of the the rainbow.  Blending as you go.


4.  Now, use the same colours to edge the piece of card.  Match the red edge to the same area as marked on the stencil.  Repeat the process for each colour.


5.  To bring back the image of the butterfly - buff it up using a dry piece of kitchen roll.


6.  Now - highlight the areas of the butterfly wings with your chosen colouring pens.  Stick to the bands of colour that have been inked through the stencil.  For example - use a blue pen to colour the parts of the wings that have blue ink on them.  Your aim is to keep the bands of colour intact.


7.  Finish the card by adding two or three additional details, such as the circle stamps from "In the Loop" / coloured sequins and a Wordage sentiment of your choice.


I think a card like this would be perfect to send to a friend in isolation as "It's our moments of struggle that define us"

Alternatively, why not make a card with a butterfly theme to enter into our Facebook Group Challenge.  Full details can be found pinned in the announcements at Crafting with Lisa Horton:  https://www.facebook.com/groups/468312444069507/


Stay safe - stay strong - happy crafting!

Until next time
Elisabeth xx


Wednesday, 15 April 2020

Easel Card By Tina Foster


Hello everyone, its great to see you're taking a look at my latest blog. Hope you'll enjoy creating this one with me. For this project, I've put together a very simple easel card using the fab new products from Lisa Horton. Of course, by using the lovely banner dies you can create any message and personalise too, making it extra special for the recipient.


Tools 

Start by taking (or making) a card blank.  The blanks I'm using measure 15cm x 15cm.  I always use 300gsm cardstock for the base card to make it nice and sturdy. Score down the middle of one half and use a bone folder along the crease to give a nice fold.
Next use the nested flags die set to cut 3 flags in your darker main colour shade. Cut 1 of the largest flags and 2 of the second smallest. Cut the contrasting lighter shade backing a little wider than your large flag (11cm x15cm) and stick onto the back of the flag leaving a border at the sides and top edge only. Now take some more white base card (15cm x 12cm) and stick this to your easel making sure when you lay it flat its the same height as your card. Wait to stick your flag onto this as you'll want to pop the strings of your banner between these layers when you're ready.

For the easel stopper cut a piece of the lighter shade of your colours measuring  15cm x 4cm. Stick it onto your card with foam tape leaving a white space underneath it measuring about 3cm. Add your 2 small flags, again with foam tape.

Next die cut your flower layers, your swirls, leaves and banner letters for your message on the card.
Put your banner together using glue. I always put the string inside the two layers for a neat finish.

Curl the edges of your flower and leaf die cuts with scissors and layer up your flowers with foam tape to add dimension. 
Stick the flowers in your desired position On the card, leaving enough space for your banners. Add your banner(s) securing on the back with 3d foam and pop it on to the easel with an equal margin at each side.  Glue the flourishes to the small banners and use foam tape to secure the remaining flower to the middle of the stopper.

Use a corner rounder to soften the bottom corners, and use Lisa's beautiful new ab pearls for a touch of elegance. And to add a little love to the message, I decided to pop on a couple of little hearts from my stash.

I hope you found this project helpful, and that you enjoyed a little crafting therapy! Until next time, please take care and stay safe x
Tina x

Tuesday, 31 March 2020

CAS Card Using Stencils

Hello Crafty Friends!

Fairuz Fabiha here from the Craftivation. Today I’ll be sharing with you how I made a clean and simple card using the Medieval stencil that Lisa will be releasing soon.

Step by step process-
1. Firstly, I took a white cardstock for the base of my card.

2. Then I masked the card diagonally, exposing the middle portion and applied & blended 3 shades of blue ink through the amazing Medieval stencil by Lisa Horton Crafts.

3. I then added two strips of silver mirror paper to border the stenciled portion of the card.

4. Added a sentiment strip from the wordage sentiment pad by Lisa.

5. Finally, finished off the card by adding some crystal embellishments.

Closeup photos-


Used Lisa Horton Crafts Products-

1. Medieval Stencil
2. Wordpad Sentiments

Thanks so much for visiting the blog. To see and fill your craft stash with more exciting products from Lisa, do keep an eye on the Create and Craft show on 3rd April.
You can also find some awesome inspirations from our design team by visiting the Facebook group for Lisa Horton Crafts Lovers, named CRAFTING WITH LISA HORTON .

Love,
Fairuz Fabiha (CRAFTIVATION). xx