Showing posts with label Elisabeth Hogarth Designs. Show all posts

Monday, 8 June 2020

Summer Showstopper


Hello again.  
Elisabeth here with a bright, beautiful showstopper of a card!  

To make a Mandala Tuxedo Card

You will need:

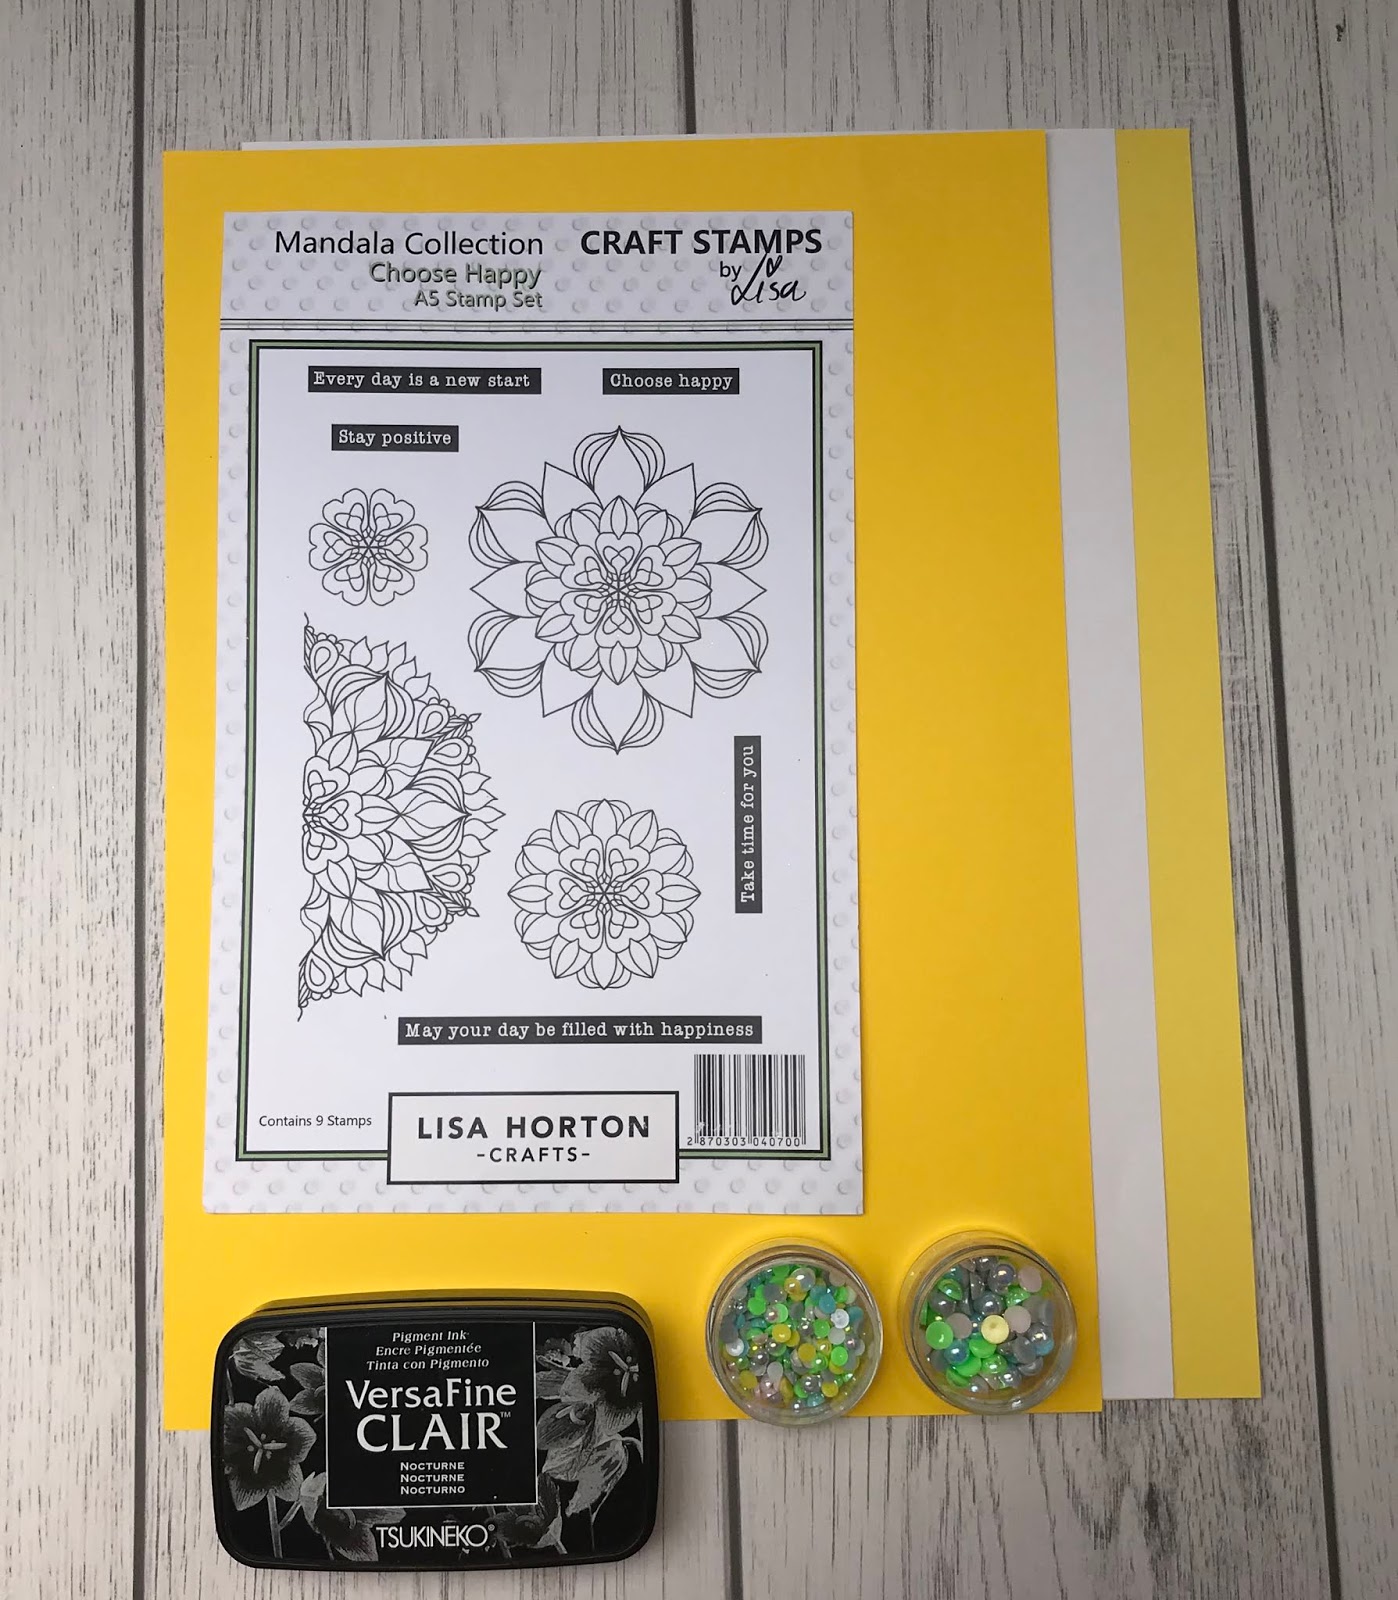
Lisa Horton Crafts - Choose Happy Mandala Stamp set
Lisa Horton Crafts - pearl embellishments
Lisa Horton Crafts - Natural Sisal
I sheet of White cardstock - approx 160gsm
2 sheets of colour cardstock - I used two shades of yellow
Black waterproof ink - I used Versafine Clair (Nocturne)
Red liner tape.
Wet glue
Sticky pads


How to create this Summer Showstopper Tuxedo card:

1.  Use the template below to create the tuxedo base card.  If you need detailed instructions then take a look at my blog post from last year,


2.  Stamp out nine medium sized mandalas and nine smaller sized mandalas.  In this version I matched a bold yellow, medium sized mandala with a light yellow, small sized mandala - and vice versa.  Stamp out your chosen sentiments too.


3.  Once cut out, adhere a small sticky pad to the centre of every medium sized mandala and layer  the smaller mandala on top.


4.  Embellish each mandala flower with a pearl from Lisa Horton Crafts ever expanding range of colours.  I used a subtle silver pearl to the centre of my mandala flowers.


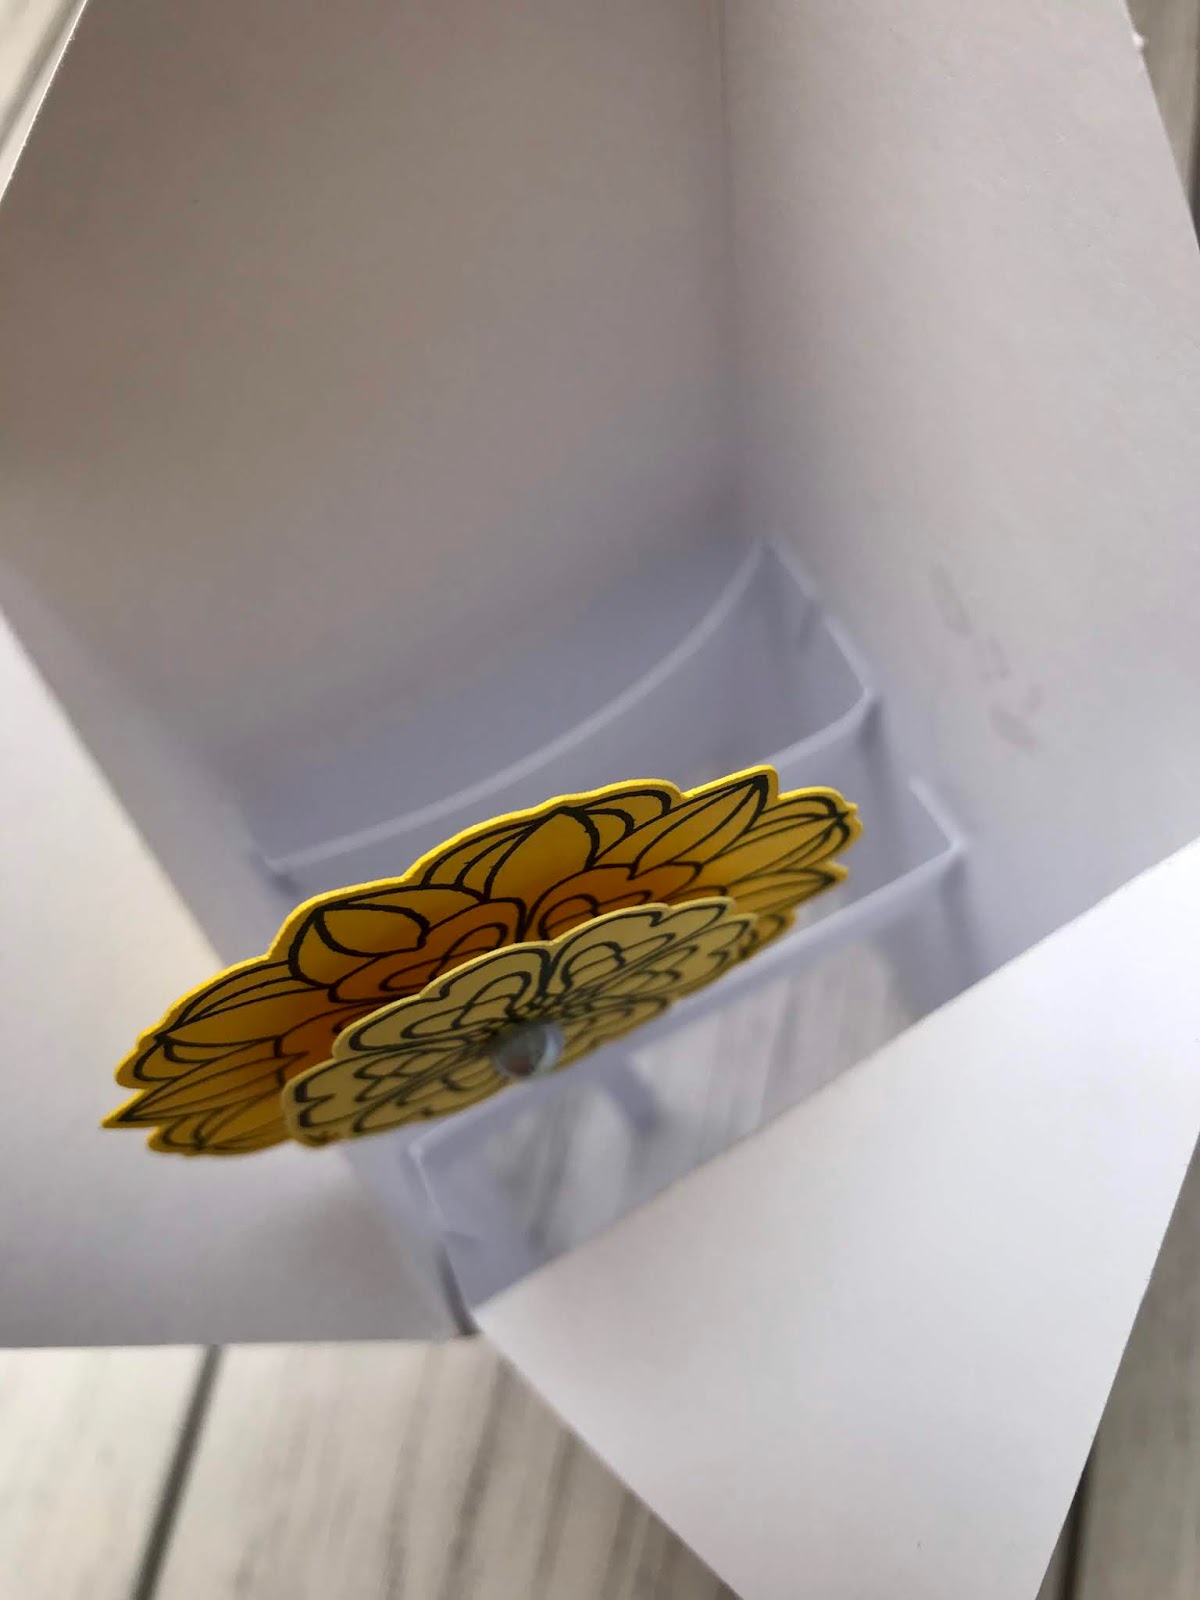
 5.  Cut several wafer thin strips of card (from the waste of your tuxedo template) and begin sticking the mandala flowers to one end.  You want the flower to feel sturdy so place the strip centrally behind the flower.


6.  Cut 3 strips of white card 1 cm in width and 9cm in length.  Score each strip at 1cm and 8cm along the length.  Fold one end back and the other forward.  These three strips will act as the struts within your tuxedo card.  Glue the tabs to the inside of your box as shown below.


7.  Normally I would decorate the outside of the Tuxedo card before making it into a box and adding the struts.  However, I did not know how I wanted the card to look until I saw the flowers in situ.  Using the spare paper from the stamped images.  Cut the panels for your card as shown.  Then decorate the front panels with the smaller mandala stamp.  The back panels are kept plain - so that a message can be written.  Glue all six panels to the outside of your Tuxedo box.


8.  Attach the flowers from the front strut, building up the height as you go.  I also added Sisal in between the rows to help the struts stay in place.  The Sisal has the added bonus of finishing off the card with a hint of wispiness.  Finally add your chosen sentiments.  

Your Summer Showstopper of a card will lie flat for posting and will pop back up again when the recipient takes it out of the envelope.


I do hope you will enjoy making your own Summer Showstopper card.  Please do share your makes with me on our Facebook Group Page - Crafting with Lisa Horton.


You can also find further inspiration for the whole range of Mandala products on our dedicated Pinterest board


As always, if you have any questions then please comment below and I will be more than happy to help you.

Keep crafting - stay safe and keep well  xx


Saturday, 16 May 2020

It's our moments of struggle that define us...


Hello again

During these uncertain times, rainbows have been a symbol of hope and strength.  My blog post today is based upon all the vibrant colours of the rainbow and Lisa's stamps namely the "Majestic Butterflies" 

 You will also need:
1 x 5" x 7" card blank
1 x 5" x 7" piece of white card
Lisa Horton Crafts -Majestic Butterflies stamp set
Lisa Horton Crafts - Bubblewrap Stencil
Lisa Horton Crafts - In the Loop DL stamp set (Currently sold out)
Lisa Horton Crafts - black embossing powder
Embossing ink pad
Black Versafine ink pad
Coloured pens
Coloured stamp pads _ I used Distress Oxides
Lisa Horton Crafts - Wordage sentiments

How to create this card:

1.  Using embossing ink and black embossing powder - heat emboss your chosen Majestic butterfly, onto the 5" x 7" piece of white card.  Try and place at a jaunty angle in the centre of the card.


2.    For this particular card you are using the stencil as the main design.  Take the Bubblewrap stencil and place it centrally over the butterfly image. Seal it down carefully so that there is no risk of movement. Gather together your inks which cover all the colours of the rainbow.  I added mine with egg blending tools.


3.  Work from one side of the stencil to the other and add the stripes of the the rainbow.  Blending as you go.


4.  Now, use the same colours to edge the piece of card.  Match the red edge to the same area as marked on the stencil.  Repeat the process for each colour.


5.  To bring back the image of the butterfly - buff it up using a dry piece of kitchen roll.


6.  Now - highlight the areas of the butterfly wings with your chosen colouring pens.  Stick to the bands of colour that have been inked through the stencil.  For example - use a blue pen to colour the parts of the wings that have blue ink on them.  Your aim is to keep the bands of colour intact.


7.  Finish the card by adding two or three additional details, such as the circle stamps from "In the Loop" / coloured sequins and a Wordage sentiment of your choice.


I think a card like this would be perfect to send to a friend in isolation as "It's our moments of struggle that define us"

Alternatively, why not make a card with a butterfly theme to enter into our Facebook Group Challenge.  Full details can be found pinned in the announcements at Crafting with Lisa Horton:  https://www.facebook.com/groups/468312444069507/


Stay safe - stay strong - happy crafting!

Until next time
Elisabeth xx


Tuesday, 7 April 2020

How to make a simple stencilled notebook,


How to make a simple, stencilled notebook

Hello - I am back again with an idea for making a simple notebook using one sheet of A3 paper and a selection of fabulous stencils from Lisa Horton Crafts.


To make this notebook you will need : 
1 sheet of A3 paper (approx 160 gsm) or stick 2 sheets of A4 paper together to make the same.
8 sheets of white stamping card (measuring 4" x 5.5")
Oxide inks or blendable inks of your choice
Black Versafine Clair
Pencils and Pens of your choice
Lisa Horton Crafts Stencils
Lisa Horton Crafts Majestic Butterfly stamps
Lisa Horton Crafts - In the Loops stamps
Ribbon and red line tape


To make this notebook begin by making a "One Sheet Notebook" using the A3 sheet of paper 
Full instructions can be found on my YouTube Channel


Next, take a variety of the Lisa Horton stencils and blend ink through them using the colours of your choice.  I tend to colour up in three areas (using the first colour ) through the stencil.  Re-align the stencil and repeat the process twice more using inks 2 and 3.  Then I look for the gaps and repeat again with stencil 2

Here are the different stencil combinations I used to start you off: 
TARTAN AND SUN BURST 
(the Oxide Inks I used were - Pink Spun Sugar/ Yellow Squeezed Lemonade/ Blue Tumbled Glass)


SUN BURST AND HIVE


MEDIEVAL AND DAISY CHAIN


PENNIES IN LINE - HIVE - HEART FLURRY 


PENNIES IN A LINE AND DAISY CHAIN


Ink up all 8 pieces of paper.  


Adhere 6 of the pieces inside your "One Sheet Notebook".  Save 2 pieces for the covers of your Notebook.


To decorate the covers of your Notebook.  Stamp two butterflies of your choice onto a sheet of paper I used pale yellow).  You can also stamp the same butterfly directly onto your stencilled papers but this is not strictly necessary.


Cut out the stamps on the extra piece of paper.  With pencils and pens, enjoy colouring in the stunning stamps that Anne Ruffles has designed.  Stick the two butterflies onto the stencilled background.  I used sticky pads (to add depth) to the centre of the butterfly - showing the stamped butterfly underneath. I also added a few of the circles from Lisa's In the Loop stamps plus a few of my own squiggles and.sequins.


Add red liner tape to the central horizontal line in order that you can secure the ribbon.  


You will hide the workings underneath the stencilled front cover.


Your Notebook can now be written in directly or maybe you could add a few tags and send it to a friend to write lists in.  Alternatively you could add pockets and insert mini cards and envelopes to send to your family.  The Notebook is so versatile you could adapt it in many ways.


As you can see - the combination of Lisa's stencils and stamps will allow you to make a creative, beautiful piece of artwork.  It is really up to your imagination.


I hope you will give this project a go and please do share your creations with us on our Facebook Group - Crafting with Lisa Horton.

If you need further inspiration then why not check out our Pinterest Pages too

Until next time.  Happy crafting
Love - Elisabeth x


Friday, 24 January 2020

A trio of Daisy Burst cards


Hello everyone!


Welcome to my first blog post as part of "Lisa Horton Crafts" Design Team.  I must say, I am delighted to be able to show you a few of the cards that I made for Lisa's launch show.  By the time you read my post, you will probably have seen all of the new collection.  My cards will be focusing on the Daisy Burst stamps and cutting dies. 


Card 1 - Daisy Burst Wreath

I began by stamping and die cutting several flowers in pale yellow. Then (using a stamping platform) I stamped a circle of daisies in pale blue. Next I stamped a sentiment using the very useful Ticker Phrases stamps. To complete the card, I placed the yellow cut out daises in between the blue stamped out daisies and added a coordinating pearls. The wreath was then mounted on the new Bali papers and yes I did gut the centre!

https://www.createandcraft.com/gb/pp/lisa-horton-edgecutz-die-and-dl-stamp-daisy-burst-flourish-set-506901?query=fh_view_size%3d24%26fh_maxdisplaynrvalues_brand_cc%3d-1%26fh_location%3d%252f%252fcreateandcraft%252fen_GB%252f%2524s%253dlisa_horton_crafts%26fh_sort%3d-_match_rate%252c-onair_cc%252c-new_cc%252c-hasimage_cc%252c-salescash_cc%252c-stock_cc


Here is a close of the shimmering pearls which come in a range of coordinating colours.

https://www.createandcraft.com/gb/pp/lisa-horton-ab-pearl-sets-with-pick-up-tool-506947?query=fh_view_size%3d24%26fh_maxdisplaynrvalues_brand_cc%3d-1%26fh_location%3d%252f%252fcreateandcraft%252fen_GB%252f%2524s%253dlisa_horton_crafts%26fh_sort%3d-_match_rate%252c-onair_cc%252c-new_cc%252c-hasimage_cc%252c-salescash_cc%252c-stock_cc


Card 2 Daisy Burst Flourish Stamp.

Within the Daisy Burst stamp set is a sizeable flourish stamp. I stamped it out 3 times (using black Versafine Clair ink) before framing a chosen part of the image. This was die cut using a square. All three squares were then mounted up onto a vibrant green strip of paper, then a black strip and stuck onto the card blank along with a Ticker Phrases sentiment.


Look how well the stamps print out. :)


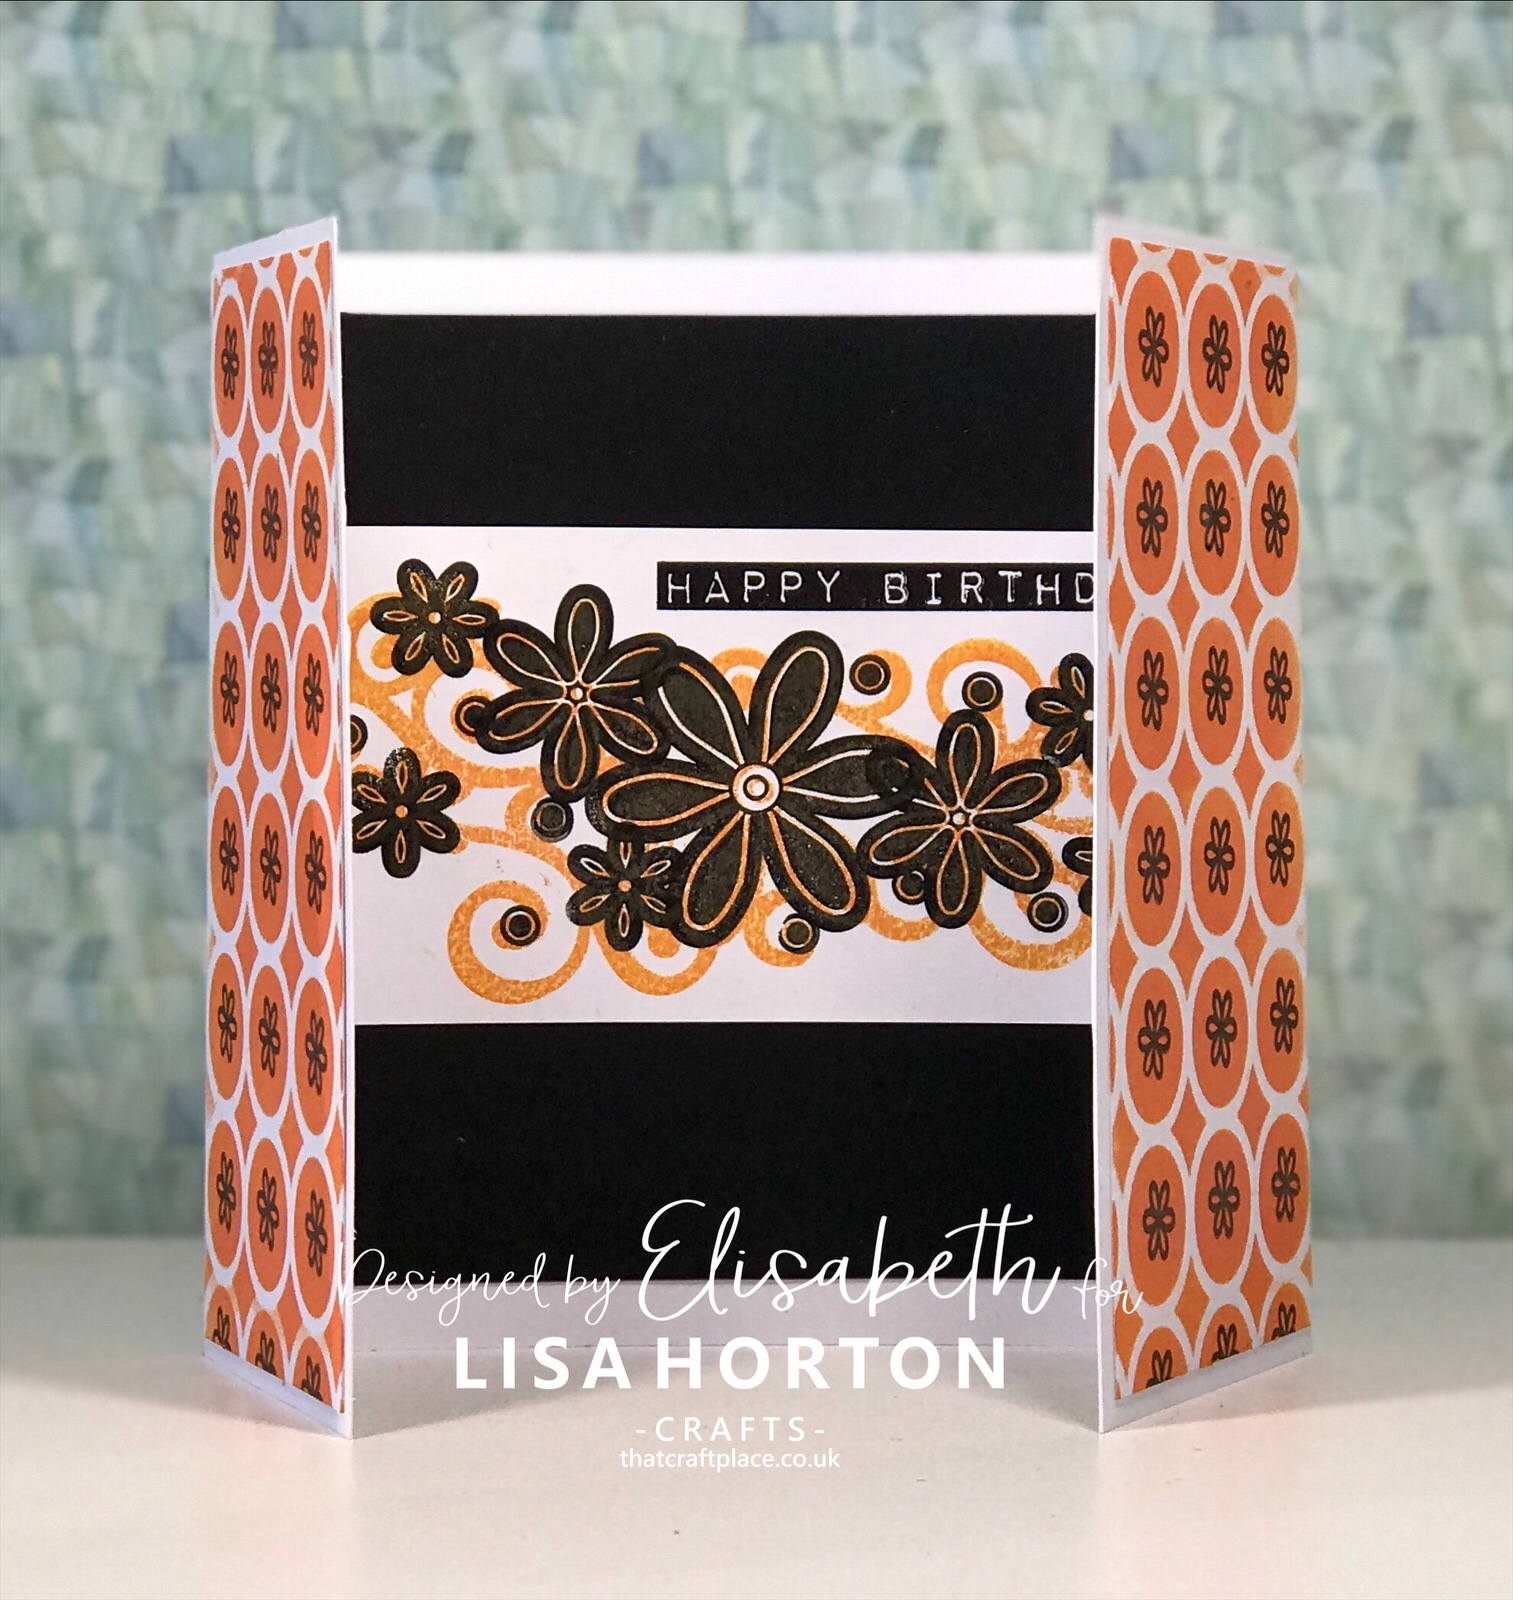
Card 3 - Retro Gatefold.

I love using rich orange and black together. I think it reminds me of my childhood in the 1970s.

I am going to show you the inside of this gate fold card first which is stamped using the Daisy Burst flourish stamp (as seen above) with orange ink. Next I used the individual Daisy Burst stamps to stamp over the flourish with black ink. A Ticker Tape Phrase sentiment was then added to complete the card.


Next I pulled out one of the funky new stencils to play with. This design is called :
Pennies in a Line (it should be available from Lisa Horton Crafts later this year)
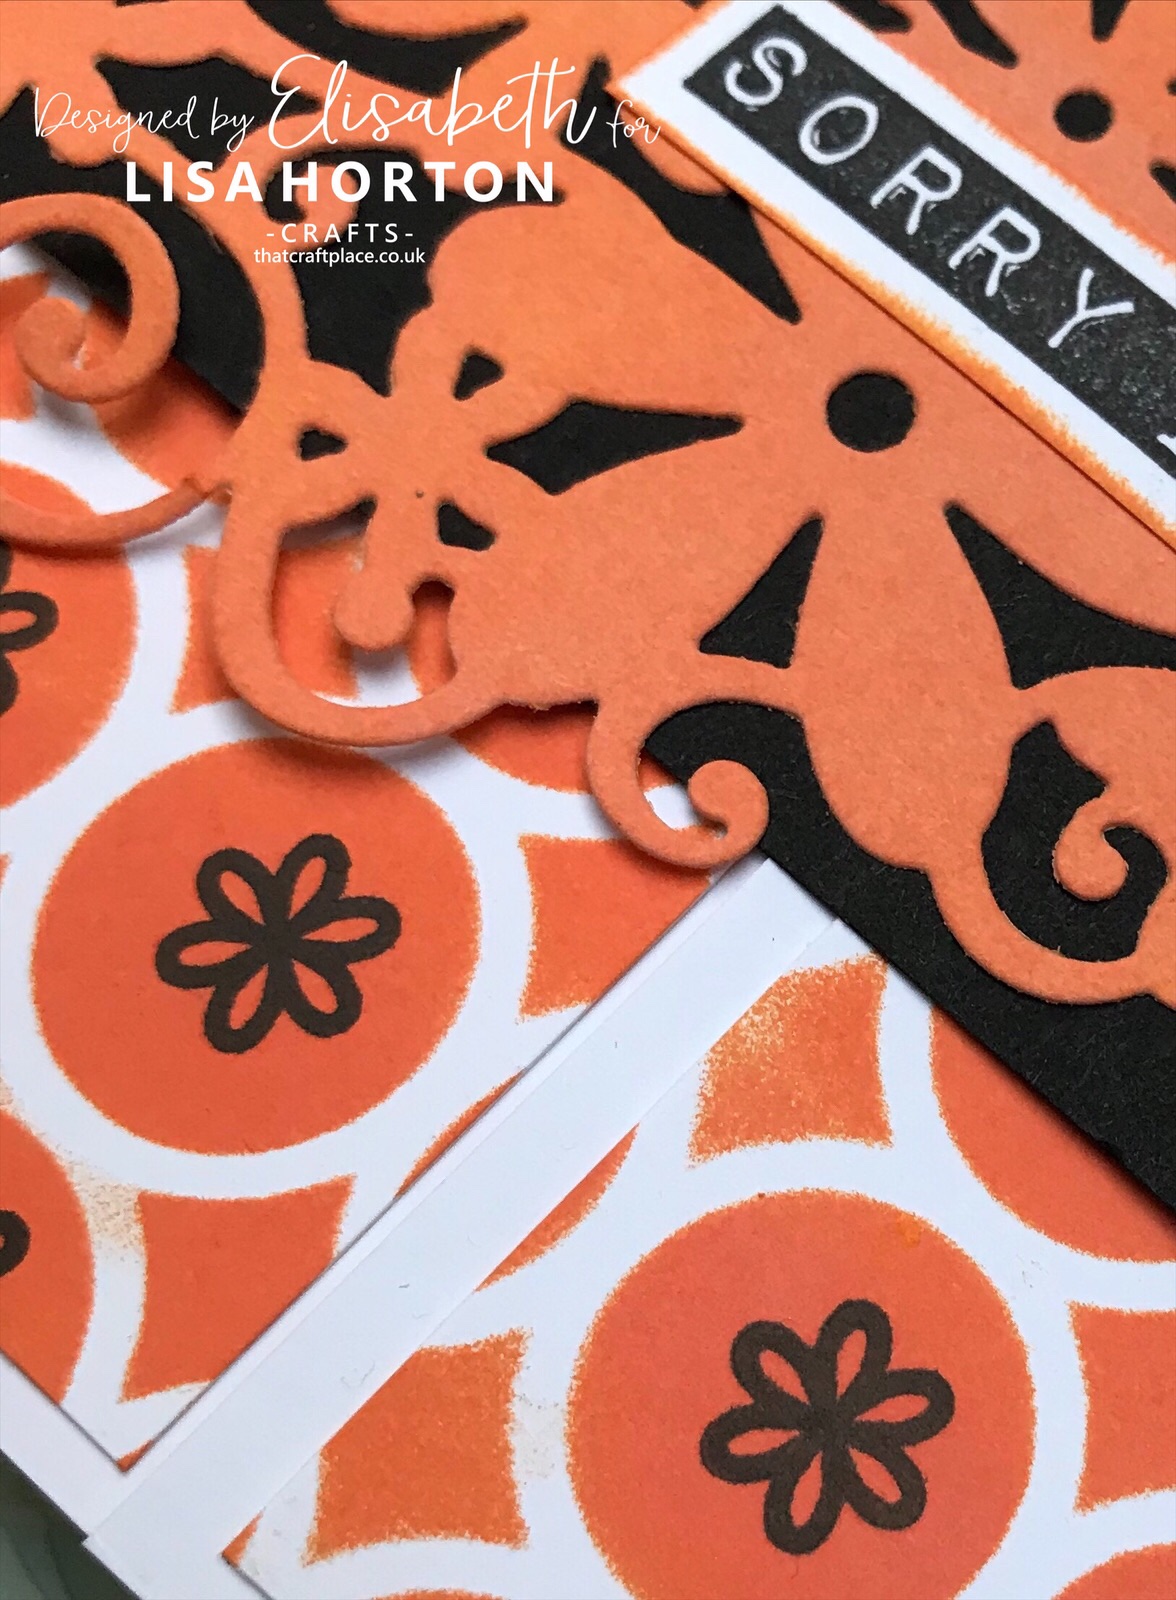
and I created my own background paper, by simply stencilling and stamping. I wanted the design to be bold so I sponged on two layers of the orange ink before taking one of the smallest daisy stamps and individually stamping each circle using black ink. It was worth it because I love the effect. This background sheet was then cut down to cover either side of the gatefold card.


To create the wrap around I die cut the Daisy Burst flourish die out twice (side by side) and inked it up with the same orange ink. 

Finally I adhered it to a long black strip which I carefully wrapped around the gatefold card before completing it all with one final Ticker Tape Phrase sentiment stamp.


I really hope you enjoy creating with everything and don't forget to share your makes on Lisa's Facebook group. " Crafting with Lisa Horton".


https://www.facebook.com/groups/468312444069507/


Alternatively follow my Pinterest page which will be linked up to all of the Design Team's latest makes

https://www.pinterest.co.uk/elisabethhogarthdesigns/


Happy crafting!

Best wishes x Elisabeth x


Lisa's new products are exclusive to Create and Craft until the 4th February but then check Lisa Horton Crafts website for details of stockists:


Thursday, 9 January 2020

All about ELISABETH HOGARTH

- MEET THE TEAM -

ELISABETH HOGARTH

I inherited my love of creating from my Mama, who was an incredible craftswoman. She had a fantastic array of wooden stamps, papers, inks, materials, threads and buttons. As a child I loved to colour, cut and stick paper – in fact I still do!

In addition to bringing up my three children on my own in Chichester, West Sussex : I shared my love of crafting with hundreds of children because I worked as a primary school Teaching Assistant for twenty years.  However, in February 2019 I decided to take the plunge and turn my lifelong hobby into a full-time passion.

I am a card-maker at heart.  During the last ten years, my style has developed and now I would say that it is clean and simple with pops of detail. Luckily, I have been invited onto a few design teams (including Craftwork Cards, Craft Consortium Ltd, The Hobby House, Splash Crafts and Strawberry Moon) which means I am able to share my love of crafting with a wide range of people.  I enjoy running a couple of Facebook groups and have “met” so many wonderful like-minded people.  Crafting is a great leveller.

To be a part of Lisa Horton Crafts new design team is a real thrill.  I am thoroughly enjoying the experience and all the new crafting goodies to play with!  I am looking forward to developing my own skill set and hopefully inspiring others to give something new a try.

“Great things are done by a series of small things brought together” V.V.G.