Showing posts with label #mermaidtails. Show all posts

Thursday, 11 June 2020

Christmas In June

Lisa Horton Crafts - Christmas in June

Hi everyone, Jane here!

We’ve almost reached that time again, and I know Lisa and the design team are so excited for her next live shows on Create and Craft.
The live shows can be found online here, or watch on the following:-
Sky channel 683
Freeview channel 95
Virgin channel 748
Freesat channel 813
Apple Tv
Amazon Fire
I tend to watch online on my tablet while crafting 😉

The Christmas shows have already started and tomorrow it’s our Lisa’s turn, and she will be bringing you a huge range of seasonal goodies to get you into the Christmas mood.

We have MDF advent calendars, paper pads, stamps, more mermaid tails and sooooo much more, so be sure to tune in at either 7:30 am or 11:15 am or even better, catch both shows for demos and ideas.
The full range from Lisa Horton Crafts can be found here.
Don’t worry, if you miss both shows, they can be watched online on catch up. Also keep an eye on our group where links to the catch up shows will be posted.
Lisa will have some amazing demonstrations lined up, and I think I speak for the entire design team when I say, we’re all buzzing with excitement.
Two weeks after the live shows on Create and Craft, you will be able to go shopping here if you prefer.

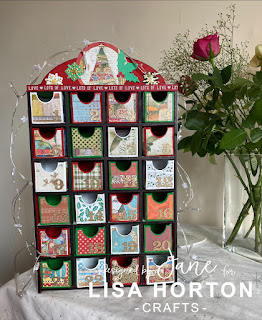
I had so much fun building and decorating my advent calendar. I used traditional colours and the Make A Wish Christmas papers from Stamperia.
You can find more ideas for Christmas from the DT on our Pinterest board here

If you’re looking for some tips on how to use your LHC stash, you can find it all over our social media channels, all of these are listed below:-
And you can always follow all the design team on Instagram by searching #lisahortoncraftsdt where you will find all of our fabulous projects.
Take care and lots of love
Jane xoxo

Friday, 1 May 2020

Butterfly Flourish Easel Card

Wishing everyone a very good morning and hope you are all managing
to keep yourselves busy. 

Here is a post to hopefully inspire you to
carry on crafting with Lisa’s amazing products.
For this project I have used - EDGEcutz Collection – Butterfly
Flourish, Mermaid Tails – Lilac Sea and Turquoise Tails and Be Happy
Sentiments DL Stamp Set
300gsm white cardstock, double side adhesive paper and lilac and
turquoise inks or paints are also required.
I used an 18cm x 13cm (7” x 5”) blank white card and trimmed to
16cm before folding the front vertically in half.
Cut a piece of white card 16.5cm x 6.5cm, stamp the ‘Be the reason..’
verse to the right side and attach with 3d foam tape to the inside
edge of the card.

Cut 4 x 9cm x 9cm pieces of white card and colour two pieces with
lilac and two with turquoise inks or paints or use coloured cardstock
if you have some. Cover each piece with double sided adhesive
paper, (do not remove the top layer at this point) and die cut two
large single butterflies and three tiny from lilac. One of each from
turquoise. Two medium one small and one tiny from turquoise.
Remove the top layer from the adhesive sheet and sprinkle lilac sea
mermaid tales onto the lilac butterflies and the turquoise rose tails
onto the turquoise ones. Rub into the adhesive and remove any
excess back into the pots.

Die cut the butterfly edge from a piece of white card 18cm x 12cm
Die cut the outer edge die from a piece of white card 18cm x 8cm.
Glue the medium sized butterflies in place before attaching the
fancy cut edge on top. Attach the whole piece to the front fold of
the easel card and trim off the excess card.

Die cut three large and one small single butterfly from white card
and attach to the corresponding coloured butterflies. Attach two of
the tiny butterflies to each end. Place one of the lilac butterflies to
the centre of the butterfly edge, place the turquoise one just to the
right of it at a right angle. Stamp ‘May your day…’ sentiment to the
left.

Arrange the remaining large and small butterflies to the left of the
‘be the reason’ sentiment and two of the tiny one’s to the right.
Embellish the bodies with pearls.
Have a good day,

Sue xx

Wednesday, 29 April 2020

Mermaid, Mica, Paste and Pearls!

Good morning everyone.
I hope you are all well and staying safe during this weird time we are currently experiencing.

Honestly I thought this lockdown thing would give me oodles of time to craft but I really don't know where my hours go to each day.  We don't stay in bed late but the days seem to just rush by and before I know it, the weekend is upon us once again.
Gosh at this rate it will soon be.................  NO!  I am not going there! Lol

Anyway, did my blog post title intrigue you a little?
I wanted to show you a little project I did using all of the items in the title.
This did start out as a card to be sent in for the Design Team work for the last show but my texture paste didn't dry quickly enough so I set it aside to use another day, and here we are!

To give the texture paste a bit of interest I added in some of the interference mica powder that Lisa introduced recently.  I think I used the purple one, mind you it never looks like I expect it to. Lol

So once I had added the mica to the paste I dragged the paste through the bubblewrap stencil, one of my favourites.  Then set it aside to dry.  Now you can dry it with your heat gun but sometimes it bubbles if you get too close so my preference would always be to air dry it.

Next I went around the edge of the card with a sponge and some Distress Oxide ink in Spun Sugar.

Using Lisa's Four Point Blooms die set I cut out some flowers using the Bali paper pad.

Now I have to be honest here, I have TOTALLY pinched this idea from Claire Newcombe because I thought it just looked A-MAZ-ING!  
I cut two of the nested flag dies and added the white (not white, lol) Mermaid Tails glitter to the smaller one and layered that up on to the next size up.  Again I went around the edge of the larger one with Spun Sugar Distress Oxide.

I added some of the Gorgeous Sisal behind the flowers and of course I just HAD to use the fabulous new Cool Skies pearls for the centre of my flowers.  The finishing touch was one of the little phrases from the Wordage sheets.  I cannot tell you how useful these are. 😃😃
See how the texture paste looks different colours from different angles?  That's what the interference mica powders do.  Cool eh?
The eagle eyed amongst you will notice that the flower in the middle does not have as many layers as the other two.  Well, that's because I got cocky and decide to cut my flowers without taping them down to the paper.  Not only did they move and not cut all of them, I have also dented one of the flower dies as the little leaf die moved underneath it!! Be warned - secure your dies if you want to make the most of both them and the paper you are using!! 😱😱😱

So folks, there you have it -
Mermaid, Mica, Paste and Pearls!
Hope you like the project.

Remember all the products I have used will be available at Lisa's website - www.thatcraftplace.co.uk  
Lisa will be back on your screens on 7 May with some GAWJUSS new stuff - honestly, it is to die for.

Don't forget to visit our Facebook group Crafting with Lisa Horton and there are oodles of samples on our Pinterest pages too.

Happy Crafting! 
xxx

Wednesday, 1 April 2020

Majestic Butterflies flying in soon!

Hi everyone, Dawn here again to give you a quick glimpse of something simply breathtaking coming up on Lisa's next show on Friday 3rd April for the Create and Craft Birthday Bonanza.

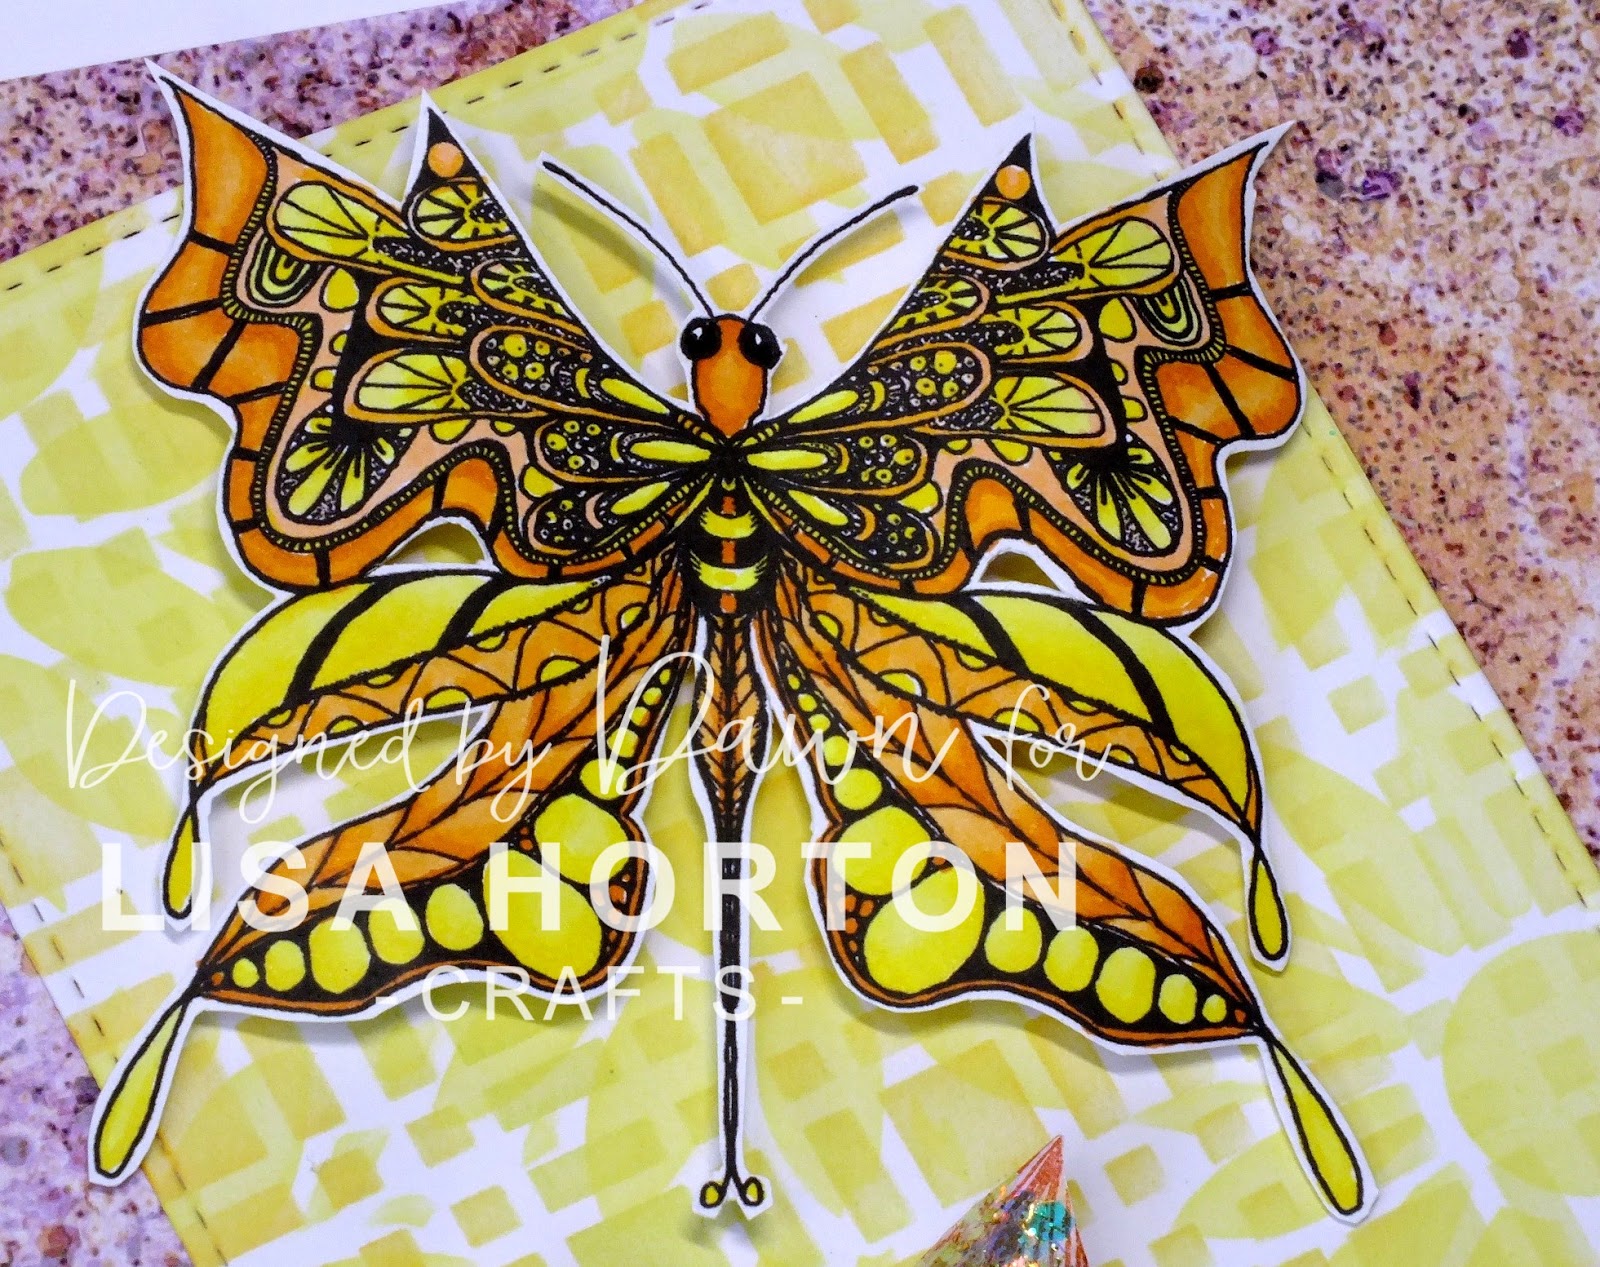
As soon as I saw these I just knew I was going to have a colouring frenzy! Lol
This butterfly is from a set called Majestic Butterflies but trust me there is so much more coming up too.  You will be spoilt for choice.

My butterfly is coloured with copics.

 I have used Lisa's Nested Flag dies and two stencils, the lattice and spring blooms and added Distress Oxide inks.  The flower is just one of the four point bloom stamps to which I have added some Mermaid Tails glitter - I just ADORE this stuff!!  It is awesome, changes colour depending on what you add it to and what card you use!! Beautiful.

Then I used one of the nested label dies and added the fabulous sentiment to it.  The backing paper is one of Lisa's fabulous double sided papers - you really NEED these, honest you do!

I used Pinflair glue to add the butterfly to the flag to give it a little bit of dimension and I shaped the petals on the flower for the same reason.

I know, it is really simple but when the images are this beautiful why would you want to hide it eh?

Remember we have a fabulous group on Facebook which you can find here.  The Design Team will share sneaky peeks of upcoming products and then just before the show we will start to show full products so you know what you can do with these gorgeous elements before the show even starts.  This group is also a place to showcase your own work using Lisa's products.  What's more, you might even win something fabulous now that we have a monthly challenge for you to enter.

Why not give it a go?  We are not looking for perfection, we are looking for fun projects that you have enjoyed making and are proud enough to show off.  Remember to add your project to the album in the group so that when it comes to voting for a winner (yes it is a chosen winner, no random selection here folks!)

You can also find inspiration on Instagram where the DT share all their makes as well as Pinterest where there are boards for all of Lisa's products.

Remember to tune in to Create and Craft on Friday 3rd April you really won't want to miss it!

Happy Crafting. xx