Friday 31 January 2020

Citrus Butterfly Card


HI LOVELY PEOPLE !!!

Welcome to my first blog using Lisa Horton's products. I am absolutely honoured to be part of such a wonderful team and work with these incredible products. I hope you like my citrus butterfly card and will have a go at making it xxx.


To  start,  scribble on a glass or blending mat with green sparkle pen or sparkle ink. Add a spray of water then dab into it a square 4" by 4" watercolour piece of card. Dab until you are happy with the design. Each one will be different. 

The more water the paler the green. Try and match with green card you have. Then do the same with a gold glitter pen, but only add a tiny amount. Dry off.


With peeled paint or any green distress ink, stamp in the loop at each side. Dry with heat gun.


Matt and layer onto black card and a coordinated green to match or as near to the shade as possible.


Die cut black and green card using Edgecutz butterfly die set.


Mount onto the stamped image to the upper left bending up the wings. 

Stamp chosen sentiment from Ticker phrases stamp set. 

Apply with the middle of sentiment raised for 3d effect. Use a quick drying glue and hold for a few seconds.


Mount onto a 6" bright white card. Add Pearl's  and lime green sisal  to embellish. 

Card finished.

I really hope you enjoyed this project and I look forward to sharing my next one with you.

Hugs 

Heidi Hobson xxx

Thursday 30 January 2020

Paul's Ink Tower


Woohoo! Here I am ready to share my first project on the blog. I am sharing with you a decorated ink tower.


I started by applying thick black gesso to all the pieces - there are a lot of pieces! Then I assembled the tower. I cut out cogs from a Tim Holtz thinlet set in black card and glued them on and used some of Lisa's new stencils to apply some texture paste. I covered it all in gesso again and allowed to dry. I added colour by splattering on some blue and purple pixie powders and spraying with water. Once dry, I then added a little Pebeo gold wax to highlight areas.


I must say, I have had one of these towers from Lisa for a couple of years now but this was the first time I decorated one and really enjoyed it. If you would like a tower, head over to THAT CRAFT PLACE where you can find this kit and many more.


You can see the top here which can be included or left out if you want a flat top.


Thanks for joining me today.

Paul

Wednesday 29 January 2020

Listen To Your Heart - Mixed Media Tag

Hello Crafty Friends!

Fairuz Fabiha here. Welcome to my first blog post as a design team member of the Lisa Horton Crafts! I’m so glad to be a part of this super talented and amazing team and also to be able to use the amazing new products that Lisa is releasing.
I hope you’ll like my today’s project where I’ve used-
Lisa Horton Craft’s

•Large Greyboard Tag
•Greyboard Heart Embellishments
•Motivational Words Stencil
•Hive Stencil
•Retro Rectangles Stencil
•Sisal
•Word Pad Sentiment


Video Tutorial-


Close up pictures-


Thanks so much for visiting the blog. To see and fill your craft stash with more exciting products from Lisa, do keep an eye on the Create and Craft show on 3rd February.
You can also find some awesome inspirations from our design team by visiting the Facebook group for Lisa Horton Crafts Lovers, named CRAFTING WITH LISA HORTON.

Love,
Fairuz Fabiha (CRAFTIVATION). xx

Tuesday 28 January 2020

Use up your 'greyboard negatives'!

Hi everyone.
I know that once you get your hands on Lisa's products, you won't be able to stop - I couldn't!
I quickly had quite a few greyboard sheets with popped out elements... but it felt like waste simply chucking them out. So I decided to play and utilise them as a base for mixed media projects that can be used as... an unusual card (rather than a traditional paper one) or cool piece of home decor.


The awesome thing about using the 'negatives' is that you can leave them as they are with the holes or back them with paper of your choice adding to it another texture or design. Here, I decided to go for the holes - my wall is pretty enough to let it show through the flowery cut outs.

Here's how I made it:


Start by preparing your negative - I used ivory matte chalk paint.


I didn't use white because I wasn't going to completely cover the base in colour and white would have been too 'clean' for the design I had in mind.


Once ready, I glued some of the greybeard flowers and heard creating a dimensional base - it looks quite cool with the 'holes' in the negative and the added height of the toppers.


Cover the whole base with Ivory paint once again. Then choose Brusho powder which will be the colour of your project - I went for Burnt Sienna and Copper Sprinkle It to make it look a little bit rusty.


Sprinkle both focusing on the area that you have built up with the elements.


Mist it with water as much as you wish - I was aiming for the colour to be on the layers with only shades on the base.  


This is what it looks dried - you can see small puddles of colour on the left side of the base.


To finish the project, I added a metal tag and secured it with a sisal rope.


Doesn't it look cool?!


But then I thought... I could add something more to it!


Two flowers and a photo make such a difference!!!


Next time you use up your greyboards, make sure you utilise the negatives, too!

See you next time!


Monday 27 January 2020

Texture Tag with Stencils and Greyboard Heart

Mixed Media MDF Tag by Nikki for Lisa Horton Crafts

Hi everyone, Nikki here with my first blog post! Today I am sharing an MDF tag I have altered using the Heart Flurry Stencil - one of the stencils Lisa has designed.

Mixed Media MDF Tag by Nikki for Lisa Horton Crafts

I started by adding texture paste through the stencils and then with my palette knife creating additional texture by scraping into the surface a little. Once dry I covered the entire tag with black gesso.

I then dry brushed with white gesso carefully highlighting only the raised surface. This is one of my favourite techniques allowing me to then add washes of coloured paint over the surface that are only visible on the white highlights... the black areas remaining black.

Mixed Media MDF Tag by Nikki for Lisa Horton Crafts

I used the same technique on the MDF hearts but this time the texture was created without the stencil.
I added a little pink sisal underneath.


Mixed Media MDF Tag by Nikki for Lisa Horton Crafts

Finally I stamped one of the greetings from the Ticker Phrases stamp set.

See you next month
Nikki 
xx

Sunday 26 January 2020

Greyboard Embellishments {By Rachel}


I've been having great fun the last couple of weeks playing with some Lisa Horton Crafts products so I thought I'd share one of the things I like to do with grey board elements.


These hearts are part of Lisa's new range, first things first if you want your colour to have more vibrancy you'll want to gesso the top surface of your piece, if you want a more muted less defined colour you can leave this, if you don't have gesso a bit of white Matt acrylic will do the job.


Once this layer has dried I start with adding just a little scrap of paper from an old book I keep for mixed media projects

I then use distress oxide in a colour that's going to match my project, that one of the best things about creating your own embellishments, you can make them to coordinate with whatever you are doing, you can use any media with them and get all kinds of effects.

Then I use a clear in pad an squish the greyboard into it thoroughly.


Then it's time to add clear embossing powder and use the heat gun to melt it whilst it's still warm I put another layer of embossing powder on, if it's still warm the powder will stick without more clear ink.


I then use some glue and stick whatever bits I feel drawn to, in this instance, I used a word cut from Lisa Horton's ticker tape stamps, some stars and some Lisa Horton sisal.


Once the glue has dried I squish it on the clear ink pad and use clear embossing powder again and I repeat this another time or two, be careful as the melted embossing powder get very hot and can drip so a heatproof mat and tweezers could come in very handy.

I can then add it to my project, in this case a journal page I'm working on.


 I really love this technique, I hope it's useful to you, greyboard is so resilient you can throw all sorts of layers at it and get lots of different effects, I look forward to sharing more techniques and projects soon 
❤️❤


Saturday 25 January 2020

May your day be filled....Butterfly & circle stamped collage


Hi there I'm Claire Newcombe (aka Creative Makings), and am so pleased to welcome you to Lisa Horton's Craft blog.

I have long been a fan of Lisa's designs and am excited to be on the design team and create the inspiration to help launch the amazing products that are on their way to you.

My passion is as a stamper first and foremost and love to create inky stamped collages, and then hopefully to provide you with the confidence to have a go yourself.

My first project is using Lisa's first stamp releases
- Lisa Horton Island Collection designer paper pad, Bali (coming soon)


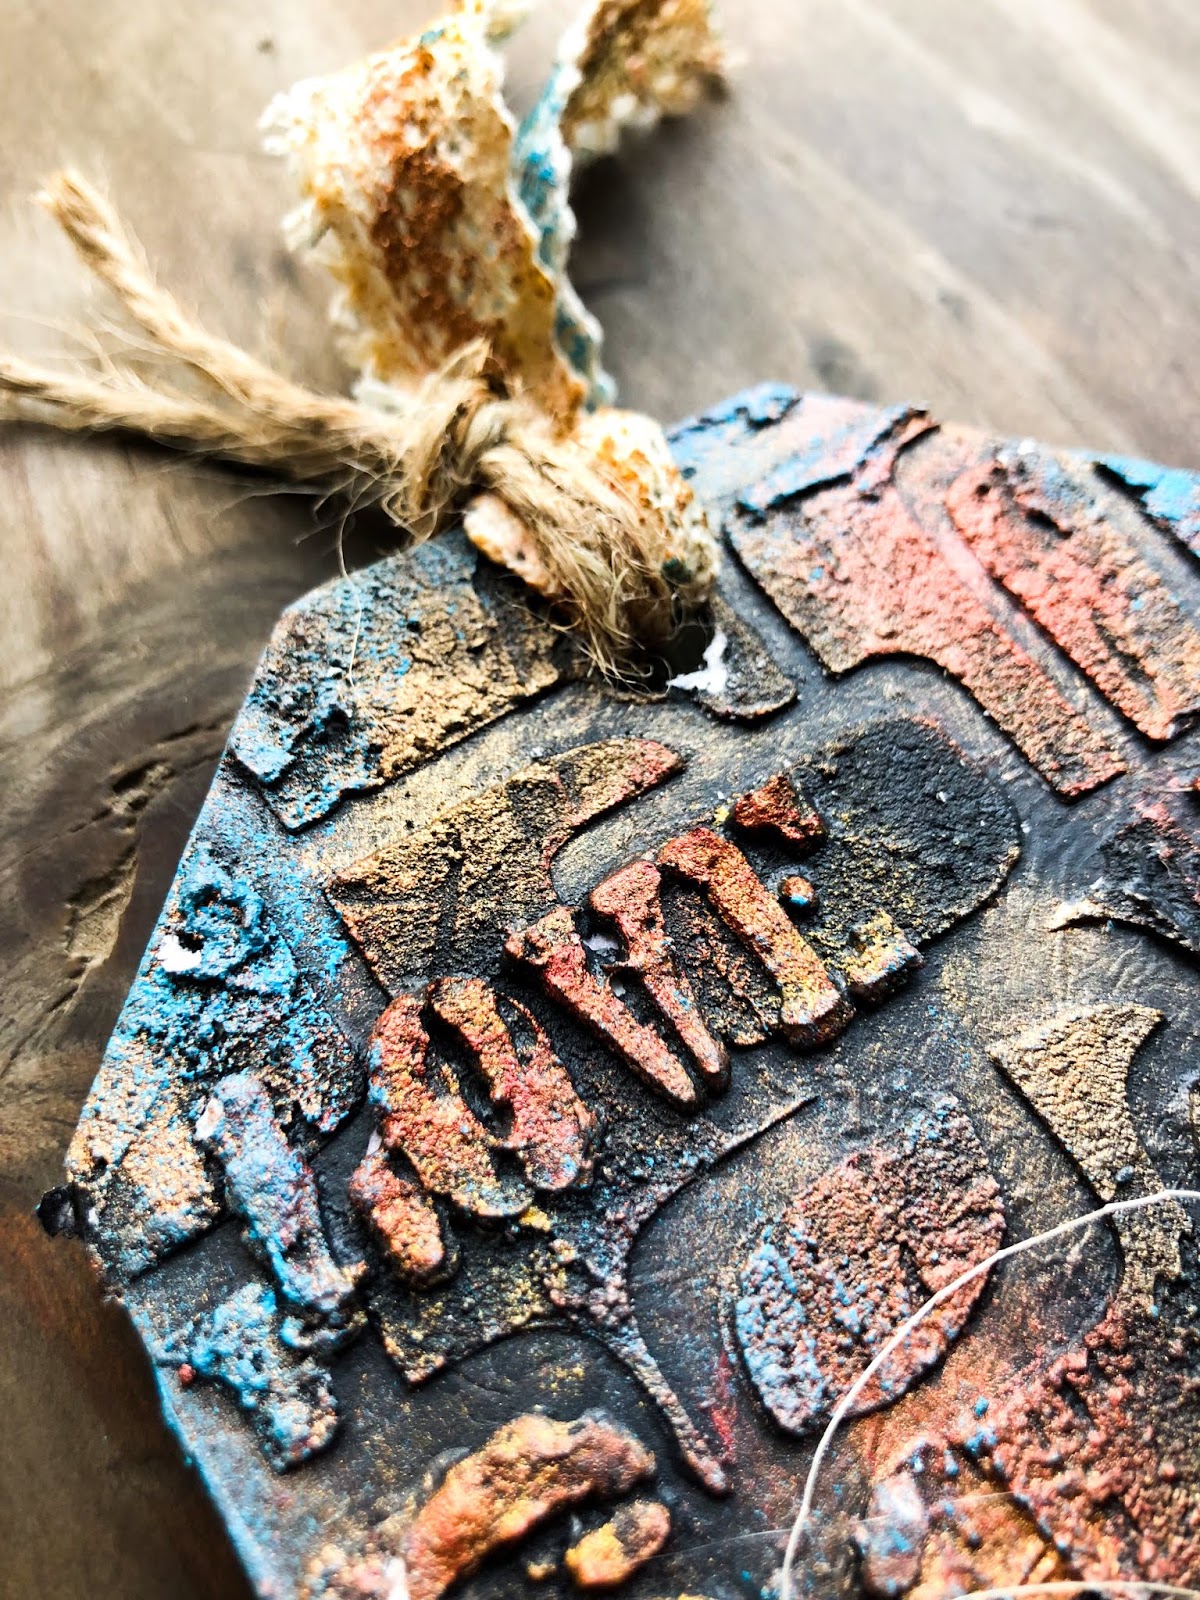
Choose 3 or 4 colours ranging from light to dark that compliment each other. The aim when layering stamped images is to use the paler colours first, working towards the last (top) layer being your darkest and most prominent images.

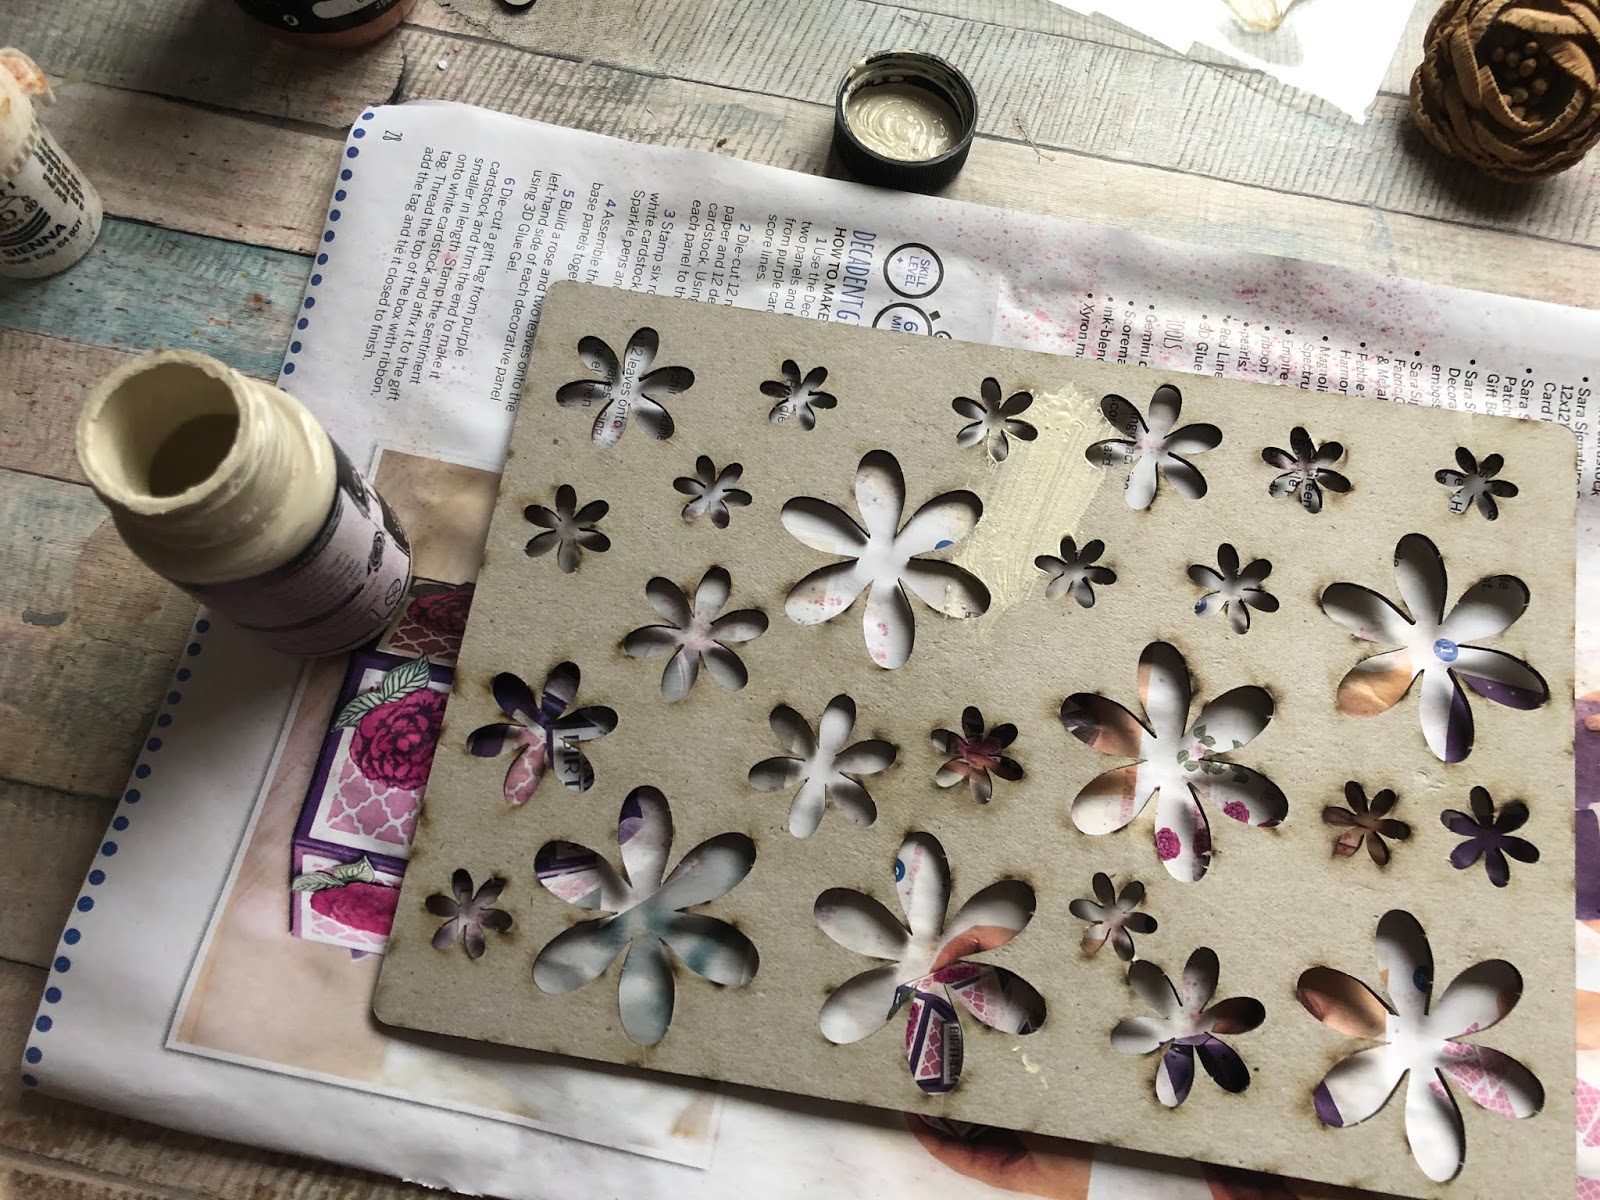
1. Create the backdrop by inking through a stencil with your lightest colour. I have used the floral stencil that was available exclusively in Lisa's first shows on the 20th January. 
(Don't worry if you missed one, there will more exclusives to come LOL!)


2. Use the same ink. or a tonal one and stamp the small accent pattern stamps randomly over the stencilled backdrop. 


3. Select a complimentary colour, and stamps that will add interest to the collage. in my example I have introduced a new shape along with the change in ink colour.

These techniques really allow you to make the most of the accessory stamps included in the set. Include the words also as a pattern building tool.


4. Stamp the main stamp image in your your statement colour. Here I have taken the largest circle stamp and stamped in bold blue over the layered background I've already created.

Remember that you don't always have to use the whole image. You can see I have masked off probably half the stamp with post it notes before inking, because it was too large to fit the project I was making.


5. Select and randomly stamp a couple of the larger accessory designs in your darkest ink colour. This adds to the layering and dimension. 
Probably best not to over do this layer, because it could swamp the focal point and look cluttered.  
It is of course depend entirely on the designs you are using, there is no hard and fast rule.


6. The final layer is usually the sentiment, and I like to stamp it in black. I like the crisp contrast against the design that really makes it stand out. 

I also like to stamp the wording directly onto my project, and find a stamping platform invaluable, as it gives me the confidence that I won't ruin my work. You can of course stamp the wording onto a separate piece, then mat and layer onto your card. Again it's all about personal choice.


7. Finally, I chose one sheet of the Lisa's fantastic new designer paper pads, to mat and layer my work onto , and accent by die cutting a couple of the individual EDGEcutz butterflies.


Thank you so much for popping by today, I do hope I have taken some of the mystery out of layered stamping. If you do have a go, come over and share in our Facebook group (link below). 

https://www.facebook.com/groups/468312444069507/?ref=bookmarks


Lisa's new products are exclusive to Create and Craft until the 4th February but then check Lisa Horton Crafts website for details of stockists: