Showing posts with label Ewelina Gryglak. Show all posts

Monday, 27 April 2020

Colourful Art Journal

Hey everyone!
Today, I have for you a bright and colourful art journal.


Not my usual thing - either art journals or bright colours - but it kind of just happened and I think the outcome is pretty cool.

Here's what I did:


Start by gluing on some of the sentiments and various tissue papers for the first layer on the background.


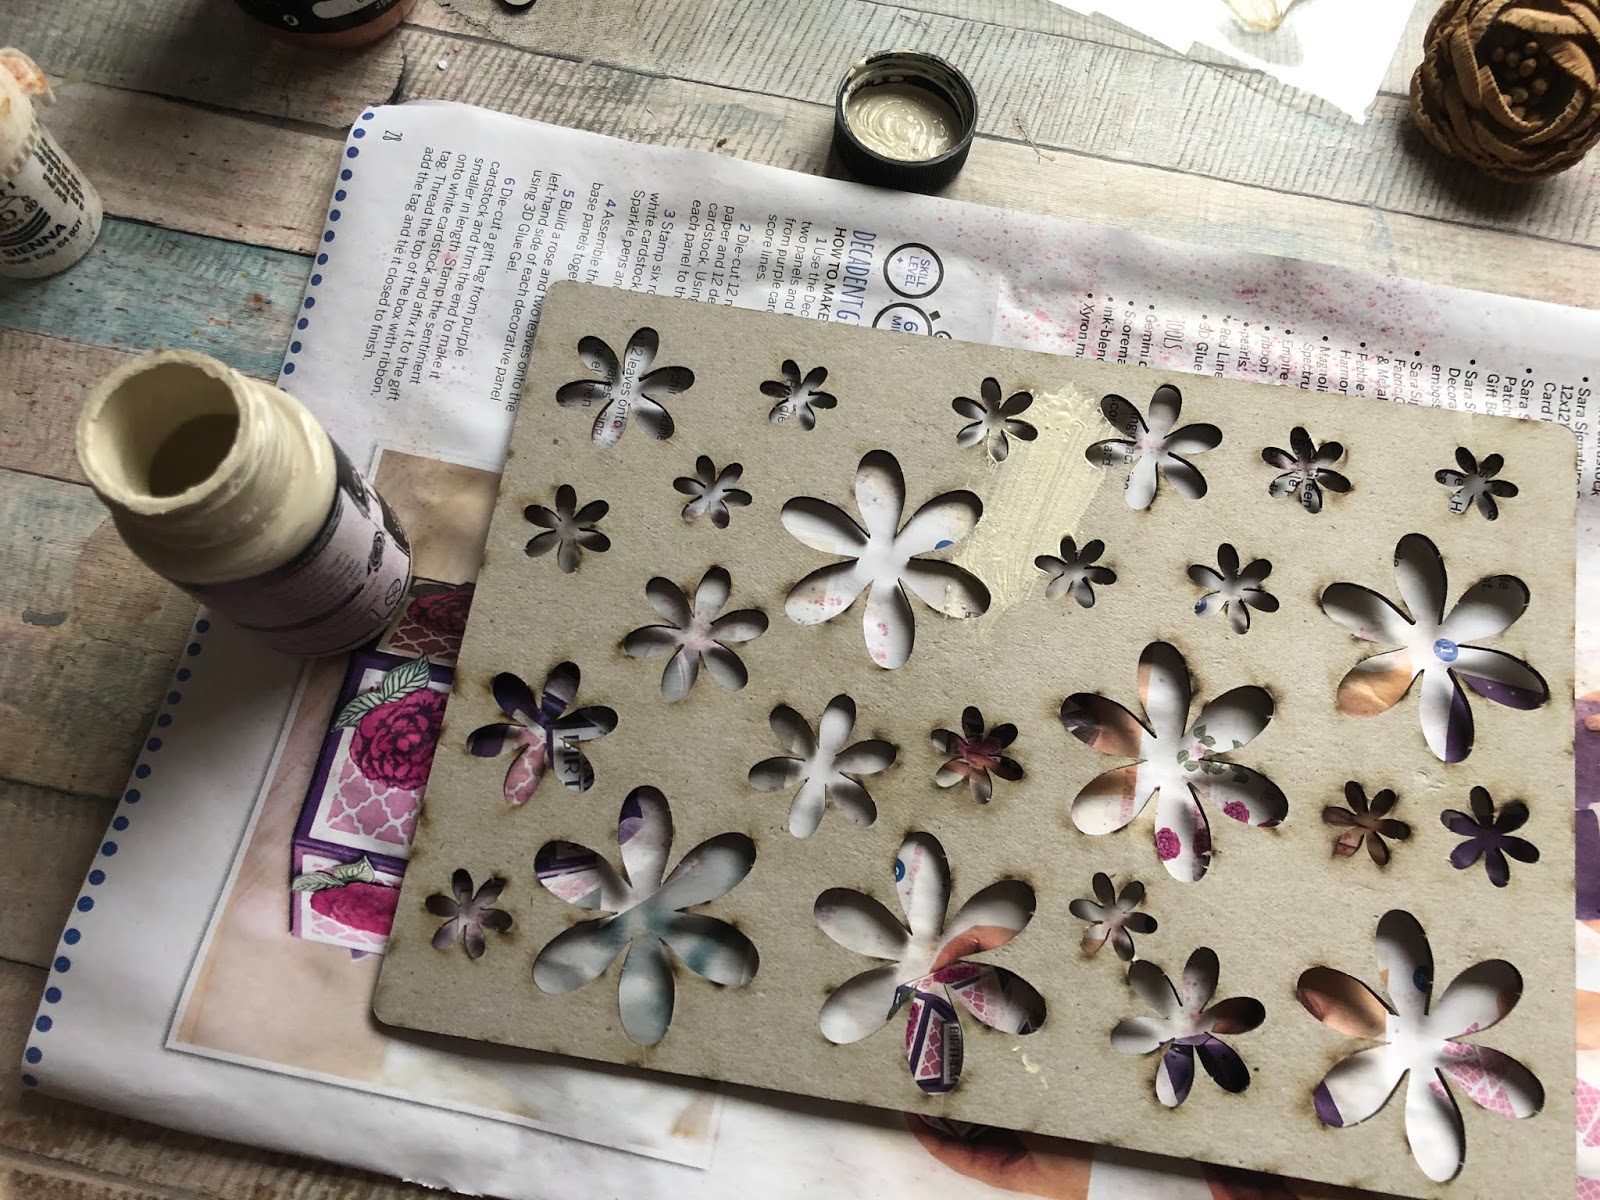
Once I was happy with the 'stickers', I added some paint and wiped out excess through my stencils 
(here, I used Groovy and Mosaic).


When the stencilled paint dried, I added little splodges of paint all over and smeared them out with my fingers - I kept adding and drying until I was happy with the result.


Next, I used the Creative Words stencil to add black pen wording over the colourful background.


The final step was to lighten up the page with white spots using white chalk paint and Bubblewrap stencil. I also added a few more phrases from the Wordage Sheets and outlines a quick frame with black pen.


Here are some close-ups of the page:


See you next time!


Friday, 13 March 2020

How to make a MDF book - romantic hard cover journal

Hey everyone!
I wanted to share with you my latest MDF book.
I don't usually make romantic, pastel projects but this one just kind of happened.


Let's start by making the book...


Glue the book covers and spine on your chosen paper - it's vital that you leave 0.5 cm in between the covers and the spine.


Trim any spare paper around the edges but make sure you leave at least 0.5 cm for wrapping over.


Cut out the corners as above to allow for neat wrapping.


Now, it's time to start wrapping over the paper. 
Make sure you're using a strong double-sided tape for this!
Start from the short edges.


Then the long edge.


Now your outside cover is ready.


For the inside cover, you need to cut a rectangular piece of paper and simply glue it in place.
Make the rectangle minimally smaller than the cover itself.


Delicately fold the cover to create the crease between the covers and the spine.


You're ready to start decorating!


Using Retro Petals stencil and two colour-coordinating inks, add a design creating background for the embellishment cluster.


Build up layers using lace, paper embellishments and flowers.


Keep adding until you're happy.


I decided to make a matching journal insert for the book.


With the same colours as the cover, I added the stencil design.


Then built up the embellishment cluster.


Time to add the insert to the book.


Make a loop from a lace - make sure it's big enough to fit the cover through it.


Making sure you don't damage it, slide the cover and the journal through the lace ribbon - you might want to do it through the back cover rather than the front one.


The lace ribbon will keep the journal in place.


You can add more inserts the same way.


As you can see, the MDF covers are extremely versatile, so make sure you grab some from the shop and make your own books!!!


Friday, 28 February 2020

Who said hearts have to be red? MDF tag


Hey everyone! 
Today, I'd like to share with you my MDF tag with GREEN hearts. 


Yes, GREEN - anyways... who said they have to be red?


Start by glueing the greyboard hearts to your MDF tag - this is to add dimension.
Then paint it with a base colour - as usual, I used ivory but white will be just as good.


Next, use the hearts stencil and run texture paste through it - but only on the hearts.
It might be a bit tricky but you can clean up all the excess when taking the stencil off.


Next is colour - I opted for two shades of fluorescent green.


Now decorations... Green and yellow flowers, some lace and green sisal (which you can find in Lisa's shop). 


Al you need to do is arrange the elements into a lovely cluster with sisal and lace as the base.


To 'spice it up', I have also added some purple buds, glass cabochons and outlined the edges with a white acrylic pen.

Your tag is finished and... looking awesome in green :)

See you next time.


Tuesday, 28 January 2020

Use up your 'greyboard negatives'!

Hi everyone.
I know that once you get your hands on Lisa's products, you won't be able to stop - I couldn't!
I quickly had quite a few greyboard sheets with popped out elements... but it felt like waste simply chucking them out. So I decided to play and utilise them as a base for mixed media projects that can be used as... an unusual card (rather than a traditional paper one) or cool piece of home decor.


The awesome thing about using the 'negatives' is that you can leave them as they are with the holes or back them with paper of your choice adding to it another texture or design. Here, I decided to go for the holes - my wall is pretty enough to let it show through the flowery cut outs.

Here's how I made it:


Start by preparing your negative - I used ivory matte chalk paint.


I didn't use white because I wasn't going to completely cover the base in colour and white would have been too 'clean' for the design I had in mind.


Once ready, I glued some of the greybeard flowers and heard creating a dimensional base - it looks quite cool with the 'holes' in the negative and the added height of the toppers.


Cover the whole base with Ivory paint once again. Then choose Brusho powder which will be the colour of your project - I went for Burnt Sienna and Copper Sprinkle It to make it look a little bit rusty.


Sprinkle both focusing on the area that you have built up with the elements.


Mist it with water as much as you wish - I was aiming for the colour to be on the layers with only shades on the base.  


This is what it looks dried - you can see small puddles of colour on the left side of the base.


To finish the project, I added a metal tag and secured it with a sisal rope.


Doesn't it look cool?!


But then I thought... I could add something more to it!


Two flowers and a photo make such a difference!!!


Next time you use up your greyboards, make sure you utilise the negatives, too!

See you next time!