Showing posts with label Sisal. Show all posts

Monday, 8 June 2020

Summer Showstopper


Hello again.  
Elisabeth here with a bright, beautiful showstopper of a card!  

To make a Mandala Tuxedo Card

You will need:

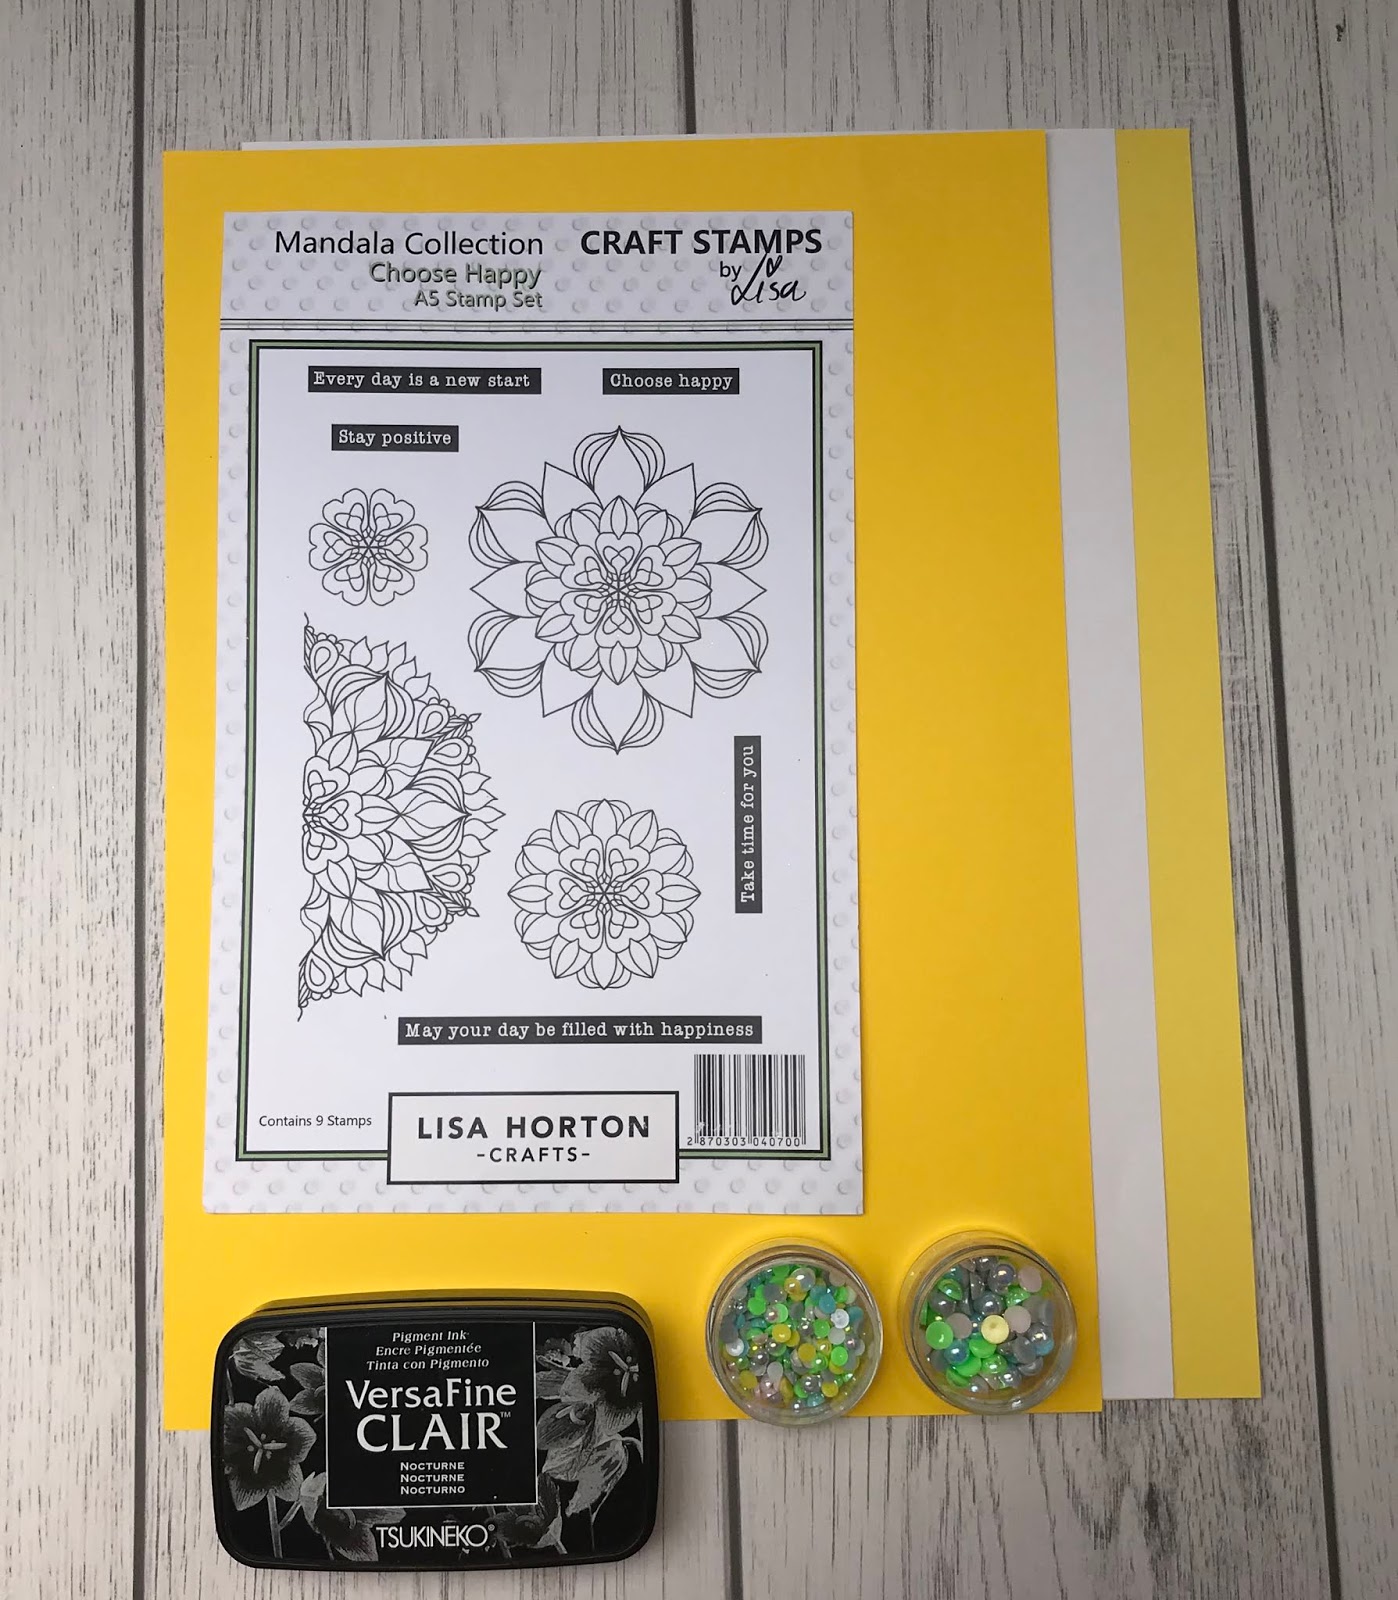
Lisa Horton Crafts - Choose Happy Mandala Stamp set
Lisa Horton Crafts - pearl embellishments
Lisa Horton Crafts - Natural Sisal
I sheet of White cardstock - approx 160gsm
2 sheets of colour cardstock - I used two shades of yellow
Black waterproof ink - I used Versafine Clair (Nocturne)
Red liner tape.
Wet glue
Sticky pads


How to create this Summer Showstopper Tuxedo card:

1.  Use the template below to create the tuxedo base card.  If you need detailed instructions then take a look at my blog post from last year,


2.  Stamp out nine medium sized mandalas and nine smaller sized mandalas.  In this version I matched a bold yellow, medium sized mandala with a light yellow, small sized mandala - and vice versa.  Stamp out your chosen sentiments too.


3.  Once cut out, adhere a small sticky pad to the centre of every medium sized mandala and layer  the smaller mandala on top.


4.  Embellish each mandala flower with a pearl from Lisa Horton Crafts ever expanding range of colours.  I used a subtle silver pearl to the centre of my mandala flowers.


 5.  Cut several wafer thin strips of card (from the waste of your tuxedo template) and begin sticking the mandala flowers to one end.  You want the flower to feel sturdy so place the strip centrally behind the flower.


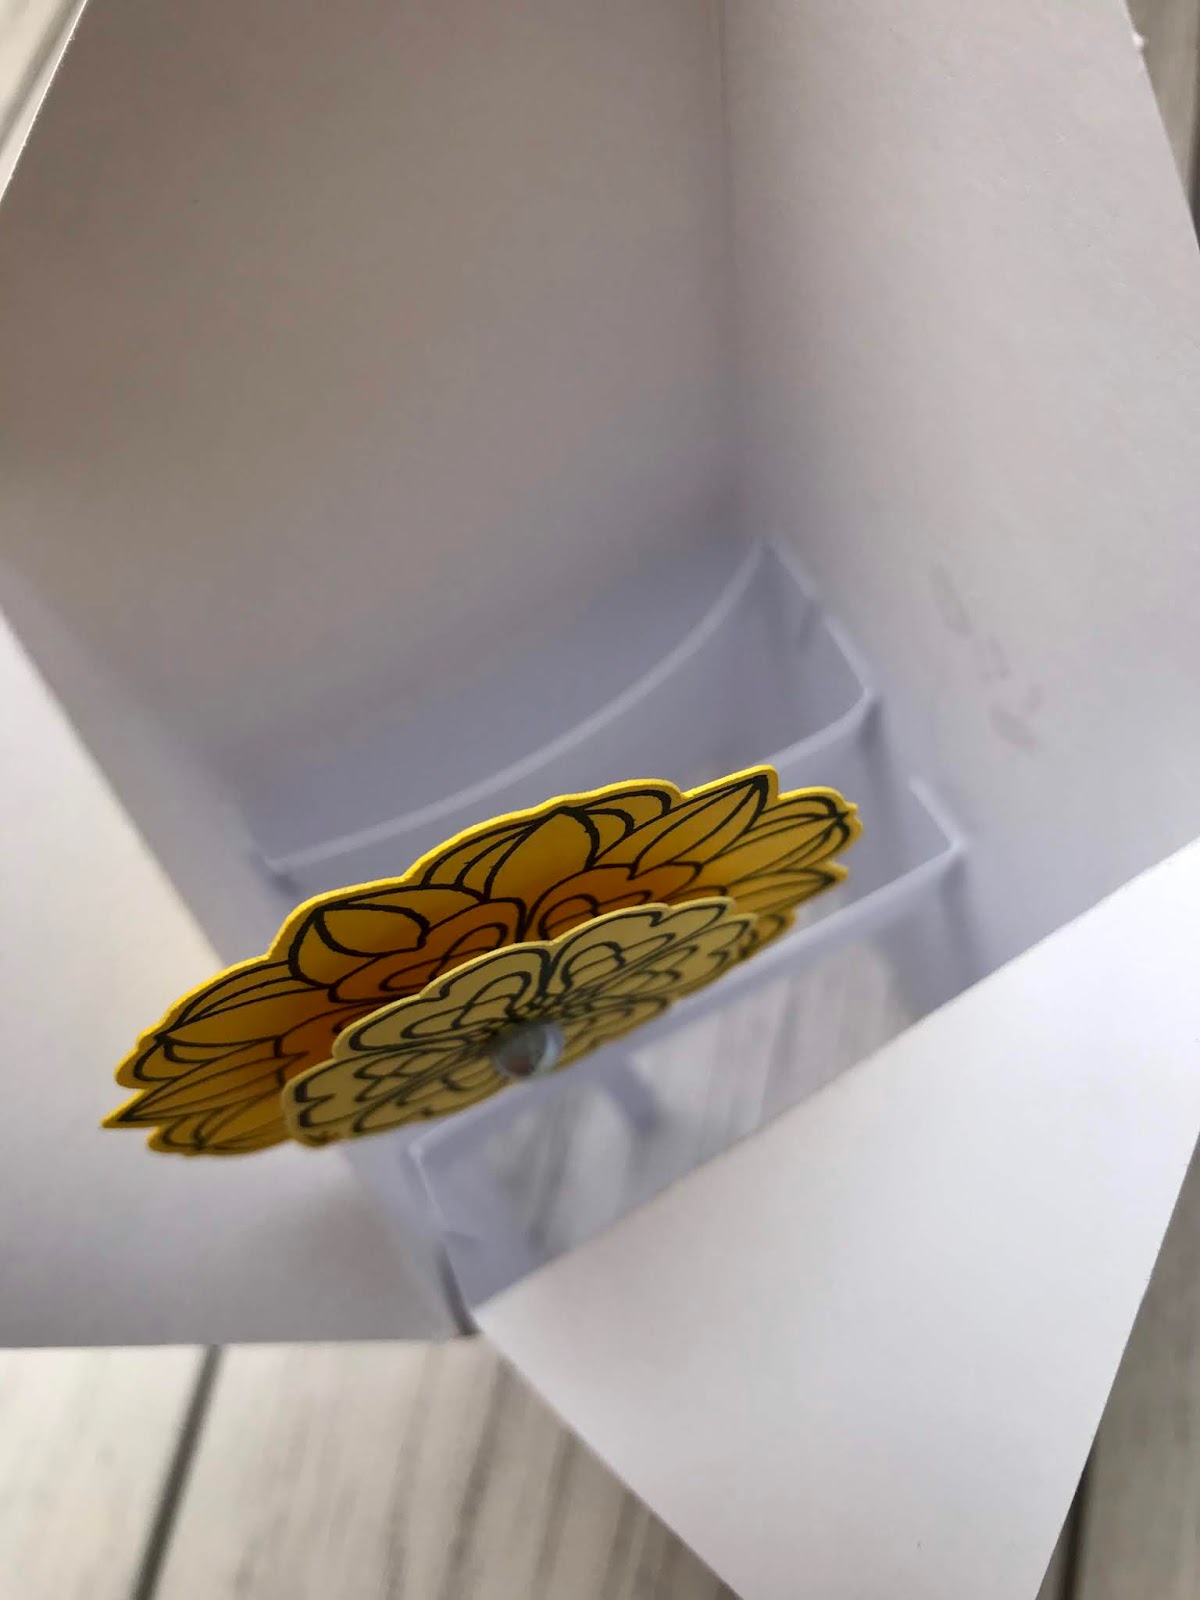
6.  Cut 3 strips of white card 1 cm in width and 9cm in length.  Score each strip at 1cm and 8cm along the length.  Fold one end back and the other forward.  These three strips will act as the struts within your tuxedo card.  Glue the tabs to the inside of your box as shown below.


7.  Normally I would decorate the outside of the Tuxedo card before making it into a box and adding the struts.  However, I did not know how I wanted the card to look until I saw the flowers in situ.  Using the spare paper from the stamped images.  Cut the panels for your card as shown.  Then decorate the front panels with the smaller mandala stamp.  The back panels are kept plain - so that a message can be written.  Glue all six panels to the outside of your Tuxedo box.


8.  Attach the flowers from the front strut, building up the height as you go.  I also added Sisal in between the rows to help the struts stay in place.  The Sisal has the added bonus of finishing off the card with a hint of wispiness.  Finally add your chosen sentiments.  

Your Summer Showstopper of a card will lie flat for posting and will pop back up again when the recipient takes it out of the envelope.


I do hope you will enjoy making your own Summer Showstopper card.  Please do share your makes with me on our Facebook Group Page - Crafting with Lisa Horton.


You can also find further inspiration for the whole range of Mandala products on our dedicated Pinterest board


As always, if you have any questions then please comment below and I will be more than happy to help you.

Keep crafting - stay safe and keep well  xx


Saturday, 9 May 2020

Quick Hello

Hello Sweet Crafty Friends!

Kendra here today to share a card with you!

This card features the lovely Medieval Stencil!!  I just LOVE Lisa and Danny's amazing stencils!!
I was so excited to try out the Deco Foil Transfer Gel!   I used the gel over the Medieval Stencil, let it dry for awhile.  Then placed the lovely purple foil on top, ran it through my die-cutting machine to apply pressure and then gently peeled away the transfer sheet!  What a beautiful design!!  I love how this card turned out!!  The shimmer/shine is so pretty!!

I also added some lovely die cut flowers from the Four Point Blooms Die set!  I added some lovely Mermaid Tails to the center of each of the flowers!!  Before I added the flowers to my card I placed some Green Sisal and then added my flowers above it!!

The 'A Quick Hello' sentiment is from the Ticker Phrases stamp set!


Have a lovely day!  


Friday, 28 February 2020

Who said hearts have to be red? MDF tag


Hey everyone! 
Today, I'd like to share with you my MDF tag with GREEN hearts. 


Yes, GREEN - anyways... who said they have to be red?


Start by glueing the greyboard hearts to your MDF tag - this is to add dimension.
Then paint it with a base colour - as usual, I used ivory but white will be just as good.


Next, use the hearts stencil and run texture paste through it - but only on the hearts.
It might be a bit tricky but you can clean up all the excess when taking the stencil off.


Next is colour - I opted for two shades of fluorescent green.


Now decorations... Green and yellow flowers, some lace and green sisal (which you can find in Lisa's shop). 


Al you need to do is arrange the elements into a lovely cluster with sisal and lace as the base.


To 'spice it up', I have also added some purple buds, glass cabochons and outlined the edges with a white acrylic pen.

Your tag is finished and... looking awesome in green :)

See you next time.


Sunday, 23 February 2020

Nested Flag Card

Hello Sweet Crafty Friends!

Kendra here today to share a card with you!

I am so excited to share this project with you today using Lisa Horton Crafts products!

I am so excited for the fun new products!!

Here is a look at one of the first cards I made with some of the new products:
I love how it turned out!!

I used the new Nested Flags to create the fun shaped card base! Along with a few more layers!  The first layer was die cut from a piece of white cardstock!  I really liked the added white flag layer!  The next layer I die cut from a piece of new paper from the Bali Paper!! (I love the paper in this collection!!)  I cut another layer the same size from a piece of paper from the new Capri Paper, but trimmed some of the flag from the top and bottom, as I just waned half the piece, but still wanted the stitching on the side!  I put it on a purple matt.

Next I placed some fun Natural Sisal!! I have honestly never used this stuff and am now absolutely addicted to it!! It adds such a nice touch to projects!!  I love it!!  

Next, I added two Nested Banners, one from purple cardstock and one from a piece of Capri Paper!
I am in love with the new Mini Banner Alphabet set!  There are so many amazing possibilities with this die set!!  I could die cut sentiments all day!!  For this card I decided to add 'HI"!  I die cut the 'H' and 'I' from white cardstock and placed above silver glitter paper die cut banners.   I love that there is the added stitching on these tiny banners!! So cute!!

I die cut a few butterfly layers from the EdgeCutz Die - Butterfly Flourish set and added to the banners.

I finished the card off by adding s few flowers!  I used the new Four Point Blooms stamp set and coordinating Four Point Bloom Dies!  I stamped the flowers on vellum and embossed with a white embossing powder.  I then finished them off by adding some Mermaid Tails to the center!!

Have a lovely day!  

Be sure to tune into Create & Craft TV February 28th for a look at all the NEW products!!!