Showing posts with label #mixedmedia. Show all posts

Wednesday, 3 June 2020

Purple Passion - Altered MDF Tag

Hello Everyone!
Fairuz Fabiha here from Craftivation! Today I’ll be sharing with you a mixed media tag using some of the amazing products from Lisa’s collection!
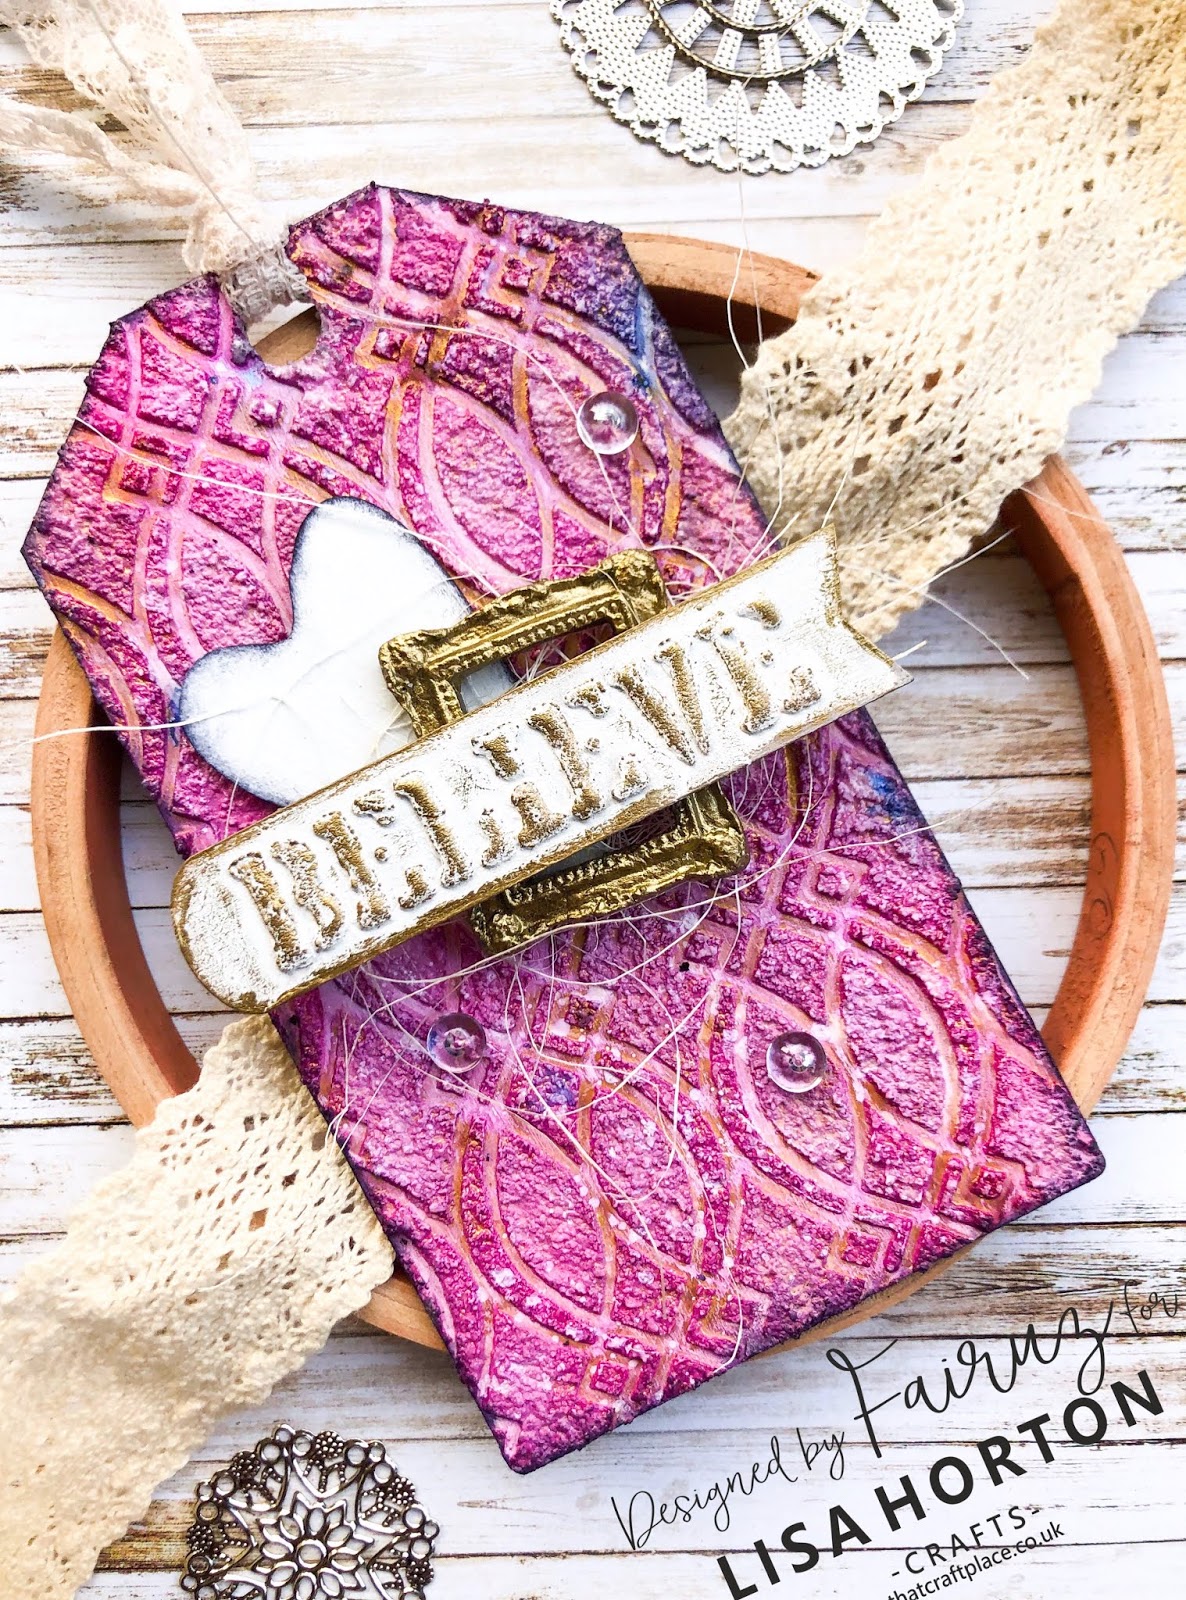


Used supplies-
1. Medieval Stencil
2. Heart Embellishments
3. Sisal
4. Creative Words Stencil
5. Mdf tag and flag

You can get your hands on these products from - https://thatcraftplace.co.uk/


To create this mixed media tag, I at first primed the mdf tag with gesso, applied a layer of texture paste through Lisa Horton Crafts Medieval Stencil.


I sprayed some distress spray stain and colored the background with magical paint.


Embellished the tag with mdf embellishments, sentiment using Lisa Horton Crafts creative words stencil and sisal!


Tada! It’s done! I hope you liked today’s project. Feel free to recreate it using Lisa Horton Crafts products and don’t forget to share it with us in Lisa’s Facebook Group - Crafting With Lisa Horton


Thanks for visiting the blog today!

Hugs,
Fairuz Fabiha xx

Monday, 25 May 2020

Rustic Round Storage Box


Hello and thank you for joining me for my first ever blog post.


Today I am going to show you how I made this gorgeous round Rustic Round Storage Box. 


You may have seen one I made for Lisa’s show back in April. Well I loved it so much I thought I would make another!


I started by using a black marker pen on the tabs as I found last time when I painted them that they can cause the tabs to expand a little so it just makes it easier when it comes to assemble at the end.


I then painted it all in black Gesso.


There are 8 sides to the box so I decided to use Lisa’s Wood Grain Stamp and also her CrackleStamp on these. I did 4 of each and embossed them with a brown embossing powder followed by some gilding wax to add to the texture.

I also embossed the top and bottom of the box with the Crackle Stamp… it looks so effective!
Next I took some substrates and gave them a thin coat of black gesso too.


I wanted to give the effect of mini doors and the Hinges and Locks work beautifully for this.
To get the rusty effect, I first used some Cosmic Shimmer Strata Paste. If you have never used this before, it gives a rough, gritty feel to it. 


I then used some Cosmic Shimmer paint in a Teal colour and sparingly coated some of the area where I had put the Strata Paste. 


Once dried, I then used some ArtDeco Transparent Yellow Iron Oxide and painted over some of the Teal paint.


Finally topped off with a coat of Quinacridone Gold and the rust effect starts to come together.   


I added some Brads to the Hinges and a drop of Alcohol ink to tone down the colour as they looked a bit bright. It gives such a gorgeous effect!

For the other 4 sides I wanted to add Some of Lisa’s Wings and Cogs, I followed the steps above for the Cogs too.


For one set of wings I used some glue to stick down some micro beads, these are great to add texture to projects.


For the other set of wings I used some Cosmic Shimmer Lava Paste. This is great stuff!! I used a thin layer and heated it to get the bubbly effect.


Once done I made a thin mix of White Spirit and Brown oil based paint to paint them. The Lava Paste soaked up the mix wonderfully and gives a great look.


I had some Skeleton leaves in my stash, I distressed them a touch with Ground Espresso distress ink. They are very delicate so you need to be very gentle with them. I placed these behind the Wings with some of Lisa’s Pink Sisal which I sprayed with brown Distress ink first and added the cogs. 


I do love my Gilding Waxes so generally go over it here and there until I feel I have the look I am after. I also added a few little keys from my stash too.


Once done, I was able to assemble the box together and I added a little metal knob on top.


I just loved doing this project!! I hope you have enjoyed this blog and I hope I have given you some inspiration to make your own Round Storage Box... 


Thank you for stopping by. 


Much Love Nicky xx


Friday, 13 March 2020

How to make a MDF book - romantic hard cover journal

Hey everyone!
I wanted to share with you my latest MDF book.
I don't usually make romantic, pastel projects but this one just kind of happened.


Let's start by making the book...


Glue the book covers and spine on your chosen paper - it's vital that you leave 0.5 cm in between the covers and the spine.


Trim any spare paper around the edges but make sure you leave at least 0.5 cm for wrapping over.


Cut out the corners as above to allow for neat wrapping.


Now, it's time to start wrapping over the paper. 
Make sure you're using a strong double-sided tape for this!
Start from the short edges.


Then the long edge.


Now your outside cover is ready.


For the inside cover, you need to cut a rectangular piece of paper and simply glue it in place.
Make the rectangle minimally smaller than the cover itself.


Delicately fold the cover to create the crease between the covers and the spine.


You're ready to start decorating!


Using Retro Petals stencil and two colour-coordinating inks, add a design creating background for the embellishment cluster.


Build up layers using lace, paper embellishments and flowers.


Keep adding until you're happy.


I decided to make a matching journal insert for the book.


With the same colours as the cover, I added the stencil design.


Then built up the embellishment cluster.


Time to add the insert to the book.


Make a loop from a lace - make sure it's big enough to fit the cover through it.


Making sure you don't damage it, slide the cover and the journal through the lace ribbon - you might want to do it through the back cover rather than the front one.


The lace ribbon will keep the journal in place.


You can add more inserts the same way.


As you can see, the MDF covers are extremely versatile, so make sure you grab some from the shop and make your own books!!!


Friday, 28 February 2020

Do Little Things With Great Love - Altered MDF Flag

Hello Crafty Friends!
Fairuz Fabiha here from the Craftivation. Today I’ll be sharing with you how I decorated the mdf flag  by Lisa Horton Crafts!


Process-
1. At first I took the mdf flag and colored it with burnt sienna and black acrylic paint.


2. Used the pennies in a line stencil and black paint to add texture.


3. Again used ‘motivational words’ stencil to add interest to the background.


4. Added metallic gold highlights.


5. Using the greyboard hearts by Lisa as the focal point. Punched four holes and tied a thread to make it look like a button and colored it.


6. Adding mdf flags and cutouts from Lisa’s nested flag dies.

7. Assembling everything and adding a sentiment from Lisa’s word pad and sisal.

Closeup photos-


Used supplies from the Lisa Horton Crafts-
1. Pennies in a line stencil
2. Motivational words stencil
3. Mdf flags
4. Greyboard hearts
5. Nested flag dies
6. Sisal
7. Word pad sentiment

Keep an eye on the Create and Craft channel today to get your hands on some of these amazing new products! xx

Love,
Fairuz Fabiha (craftivation) xx