Tuesday, 19 May 2020

Time Laspe 2 Masterboards and Decoration

Hello again, I have for you another time lapse video that I have filmed using The MDF mini bookcase and albums that were designed by Lisa Horton Crafts.  You can purchase this kit from That Craft Place.  On the front of the video you will have a supply list of all the products I have used. 


Thanks for watching, Stay Safe and Take Care
Hugs 
Tamara xx 

Monday, 18 May 2020

Teen Birthday

Hello everyone , hope you are all well .
Today it's my turn to blog so I thought I would share how I made this personalised card .


For my card I used the following products from Lisa Horton Crafts


First I cut out 2 of the larger flags and one of the next size down.

I then scored along the top of one of the larger flag die cuts before adhering it to the other large flag die to create a card blank.

The smaller flag die cut I then decorated by blending some pink and green ink over the surface before stamping and heat embossing a random pattern using one of the star stamps from the polka dot numbers stamp set 

I attached this panel to the front of my card using foam pads. 

I then die cut a small circle and stamped the numbers onto it using the polka dot number stamps .

Using the smallest flag die I cut 2 little flags, inked them, and attached them to the number circle to create a rosette .

I adhered this to the front of the card using foam pads .

The next step is to cut out your chosen name using the mini alphabet bunting.
I adhered my bunting to a piece of pink card and fussy cut around the edges 


Then I adhered these to the top of my card in a curve.
I finished my card by stamping out the word "Today" , and attaching that along with 3 little pearls .

I hope my instructions were helpful, would love to see any of your  projects using Lisa Horton Crafts products over on the Crafting with Lisa Horton Facebook page

Don't forget we also have a monthly challenge on the Facebook page where this month the theme is "Butterflies" 

Have a great day 
Happy Crafting 

Lisa Robson


Sunday, 17 May 2020

Stamping flowers

Hello everyone.

Sharing a card with stamped flowers using Four Point Blooms stamps.


For 5x7 card

Lisa Horton crafts Four point blooms stamp set and dies,
Card.
Dye based inks


Using stamping platform I stamped flowers in pink colour inks at two corners of the card and stamped leaves in different green colours. Stamped and die cut some flowers.


Stamped a sentiment and die cut a banner and matted to pink card with slightly bigger banner.


Matted and layered the stamped background card with pink card and added to base card.


Shaped the flowers using embossed tools.


Added the sentiment banner with 3D foam pads to the card as you can see. Then I glued some smaller flowers to the background and added beautiful pearls to the centre of all flowers.


Also I stamped inside of the card some flowers and leaves. 

And here I made more stamping cards in different colours with purple and blues and some sentiments.


 Hope you will try to make some of these cards using your flower stamps.
You can find these stamps and other products at That craft place shop 

Thank you for stopping by and leaving your comments.
Stay safe everyone and Happy crafting.
Hugs Natalia.

Saturday, 16 May 2020

It's our moments of struggle that define us...


Hello again

During these uncertain times, rainbows have been a symbol of hope and strength.  My blog post today is based upon all the vibrant colours of the rainbow and Lisa's stamps namely the "Majestic Butterflies" 

 You will also need:
1 x 5" x 7" card blank
1 x 5" x 7" piece of white card
Lisa Horton Crafts -Majestic Butterflies stamp set
Lisa Horton Crafts - Bubblewrap Stencil
Lisa Horton Crafts - In the Loop DL stamp set (Currently sold out)
Lisa Horton Crafts - black embossing powder
Embossing ink pad
Black Versafine ink pad
Coloured pens
Coloured stamp pads _ I used Distress Oxides
Lisa Horton Crafts - Wordage sentiments

How to create this card:

1.  Using embossing ink and black embossing powder - heat emboss your chosen Majestic butterfly, onto the 5" x 7" piece of white card.  Try and place at a jaunty angle in the centre of the card.


2.    For this particular card you are using the stencil as the main design.  Take the Bubblewrap stencil and place it centrally over the butterfly image. Seal it down carefully so that there is no risk of movement. Gather together your inks which cover all the colours of the rainbow.  I added mine with egg blending tools.


3.  Work from one side of the stencil to the other and add the stripes of the the rainbow.  Blending as you go.


4.  Now, use the same colours to edge the piece of card.  Match the red edge to the same area as marked on the stencil.  Repeat the process for each colour.


5.  To bring back the image of the butterfly - buff it up using a dry piece of kitchen roll.


6.  Now - highlight the areas of the butterfly wings with your chosen colouring pens.  Stick to the bands of colour that have been inked through the stencil.  For example - use a blue pen to colour the parts of the wings that have blue ink on them.  Your aim is to keep the bands of colour intact.


7.  Finish the card by adding two or three additional details, such as the circle stamps from "In the Loop" / coloured sequins and a Wordage sentiment of your choice.


I think a card like this would be perfect to send to a friend in isolation as "It's our moments of struggle that define us"

Alternatively, why not make a card with a butterfly theme to enter into our Facebook Group Challenge.  Full details can be found pinned in the announcements at Crafting with Lisa Horton:  https://www.facebook.com/groups/468312444069507/


Stay safe - stay strong - happy crafting!

Until next time
Elisabeth xx


Thursday, 14 May 2020

Jane Robinson is joining us as a Guest Designer

Welcome Jane Robinson 


My name is Jane, and I am a married mum of four girls. Although three of my babies are the four-legged feline variety. My daughter is all grown up now and has left home. I think she had only been gone a week when I started to convert her bedroom into a craft room. Now, I have my own little sanctuary where I can hide and make something beautiful.

I have crafted all my life practically. My mum taught me to sew and crochet from an early age, although, try as she might, I never quite grasped knitting, much to her annoyance. I am now 46 years old, and it’s only in the last couple of years that I’ve discovered paper crafting. I love experimenting with different techniques when card making, scrap booking and journaling.

My dream is to open my own shop where I can sell branded card making supplies, make pretty things to sell, and perhaps run a couple of workshops for make and takes. Whilst providing other makes to my favourite charity… the RSPCA.

I am overjoyed to be a guest on the Design Team for Lisa Horton. When I first glimpsed her on TV with her products, I just knew straight away that they were for me. I love her design styles, and everything I own with the Lisa Horton Crafts logo on has been used to create something totally unique. Not to mention I fell in love with her quirky personality.

If you need to contact me, I can be found in these places:

Facebook: ReflectionsByJane

Keep on crafting!
Jane xoxo

Wednesday, 13 May 2020

Spring Bloom - Stencil On Fabric

Hello Crafty Friends!
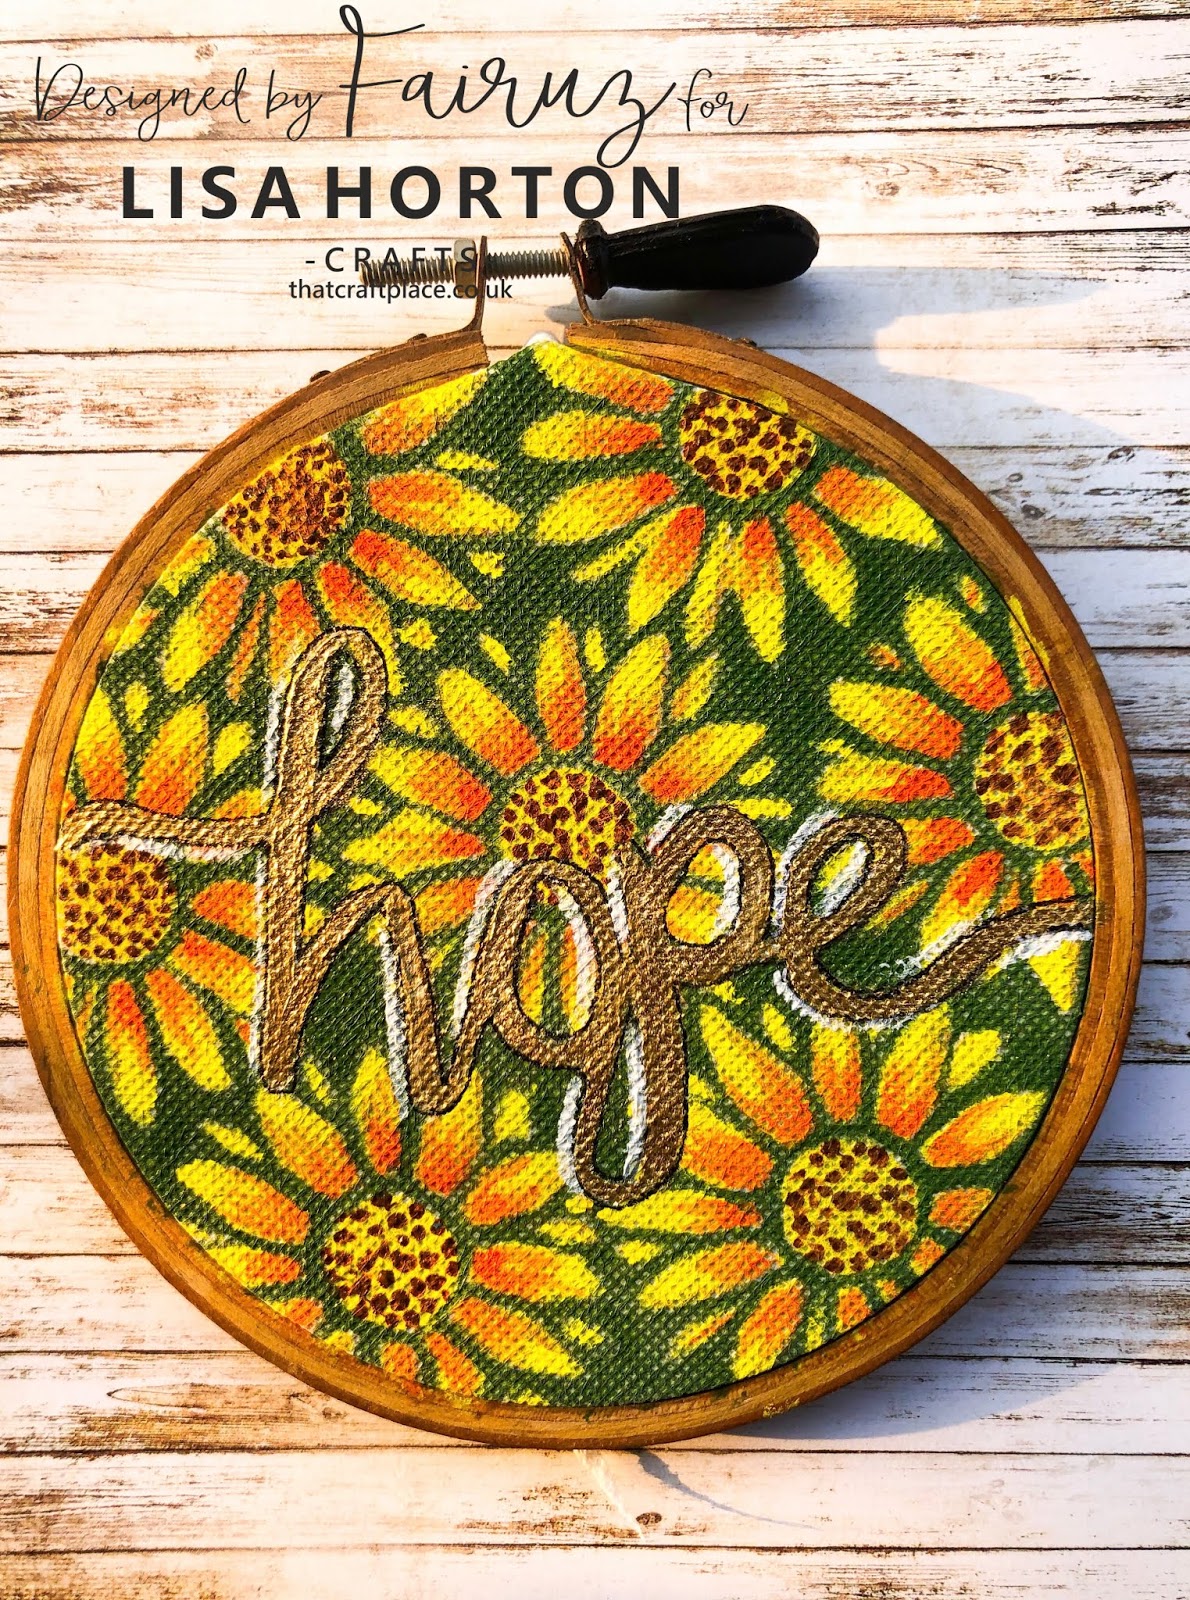
Fairuz Fabiha here from Craftivation. Today I’ll be sharing with you a fun project where I have used stencil on fabric to create a simple but vibrant wall hanging home decor. For today’s project, I’ve used one of my most favorite stencils from Lisa’s collection, the Spring Bloom Stencil.


It’s a very beautiful sunflower patterned stencil and the possibilities are endless to create with it. I’ve used it many times on papers and mdfs. But for today, I wanted to try something different and hence I decided to work on fabric.


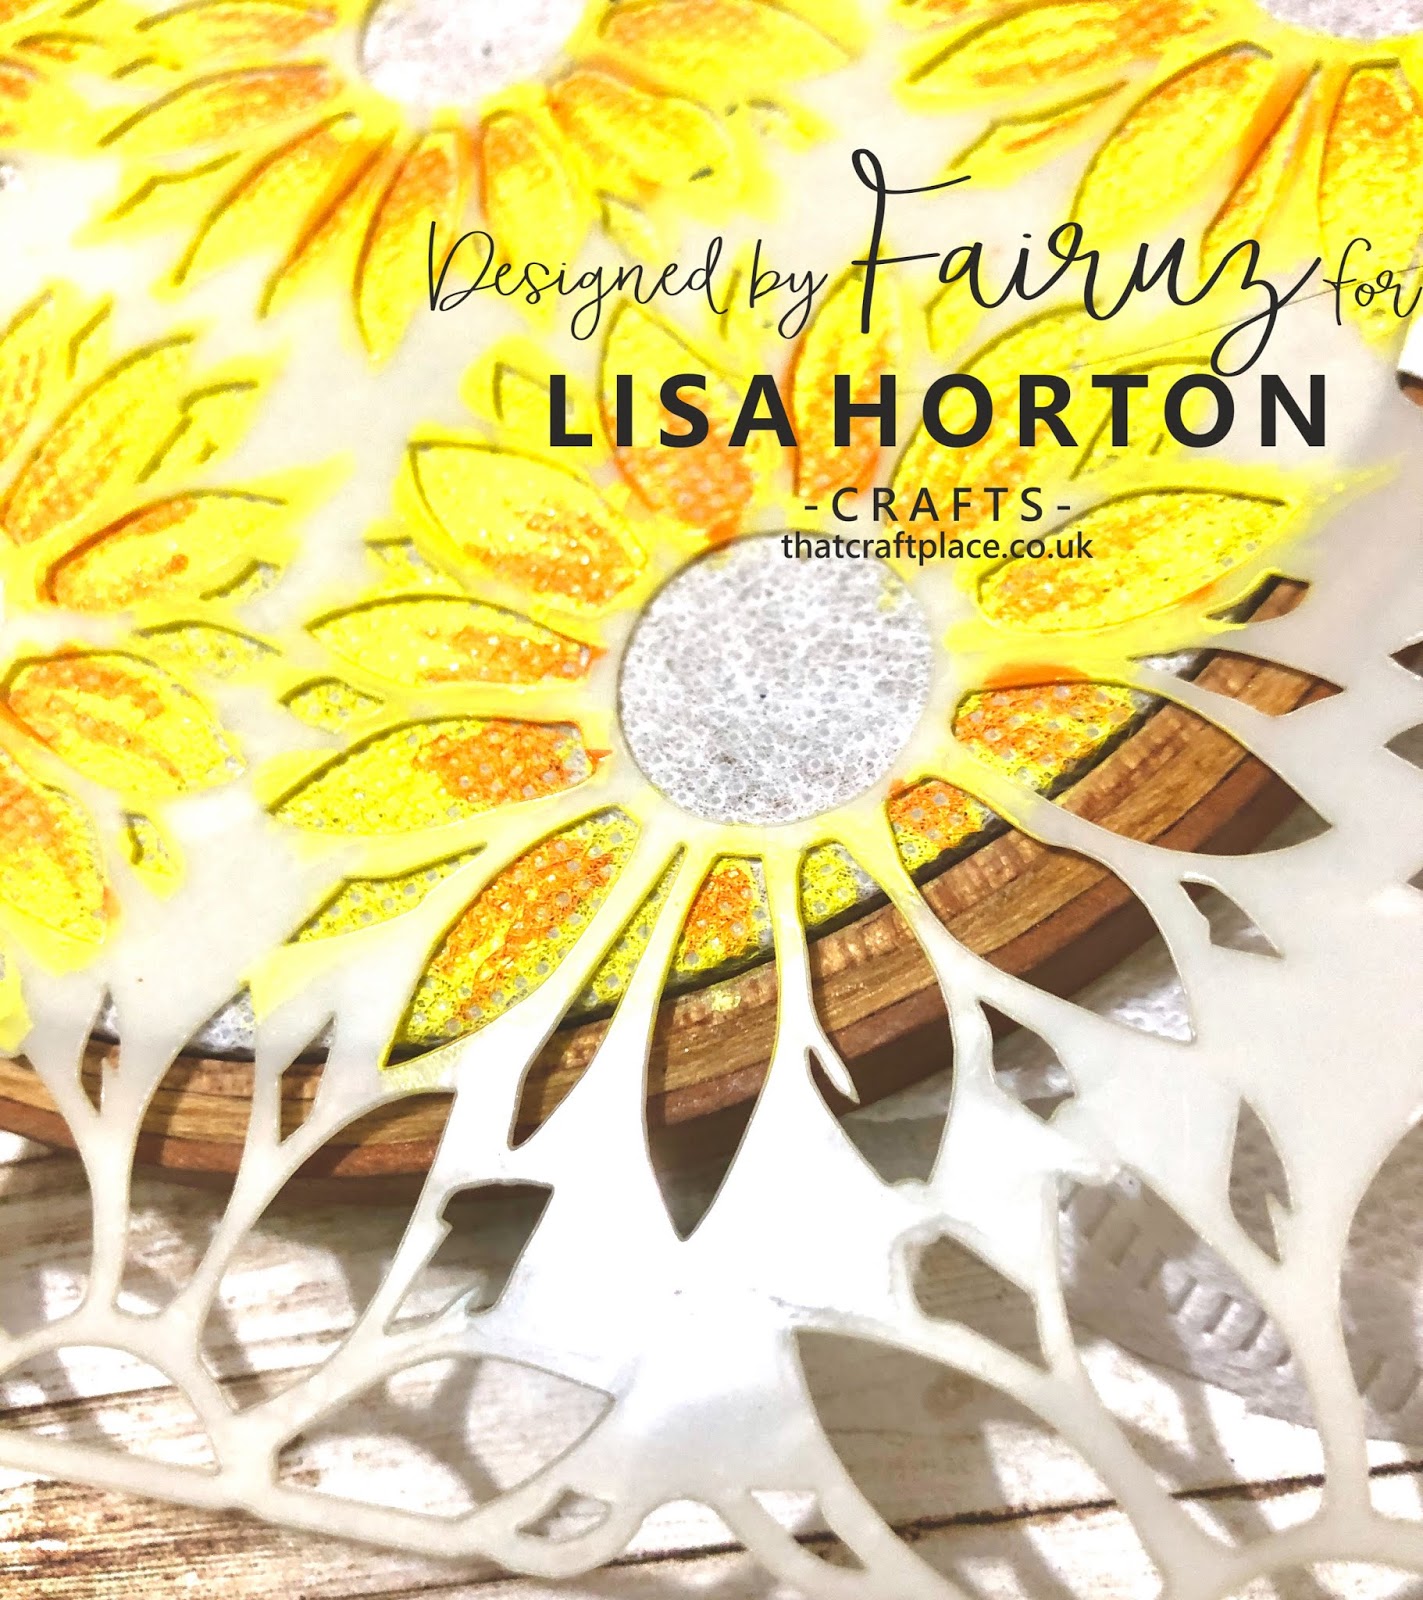
At first I took a piece of textured white fabric and tightly framed it to a sewing hoop.
Then I placed the spring bloom stencil over it and attached it with some masking tapes to keep it in place.


Then I started applying colors over. I’m not good with paintings and for that reason painting always stressed me out. But using the stencil for painting the flowers made the process very easy and therapeutic. I really enjoyed doing it this way.
After I was done with the flowers, I colored the background in green.


I let the whole background dry perfectly, then I wrote 'Hope' over it with bronze metallic paint and outlined it with black and white.

Voila! The beautiful wall hanging home decor is done! x


Thank you so much for visiting the blog! I hope you found the project inspiring and the instructions helpful.
You can all your desired products from Lisa’s collection here on  https://thatcraftplace.co.uk/
You can also share your lovely makes using Lisa Horton Crafts products on her Facebook group- Crafting With Lisa Horton .

Hugs,
Fairuz Fabiha aka Craftivation x

Monday, 11 May 2020

Butterflies in the round.

Hi all,
Me again. Lol
Today I wanted to show you how versatile Lisa's fabulous stamps can be.

My team mates are such clever folk when it comes to decorating the wonderful MDF creations that Lisa and Danny come up with and I have to say I have learnt such a lot from them all.
MDF STORAGE TUB
However, with this gorgeous Arty Storage Tub I didn't want to use papers so I chose to paint it with a pearlescent acrylic paint.  In this case I used DoCrafts Artiste Pearl Acrylic Paint in Ice Blue.
I used two coats to ensure a good coverage but it went on beautifully.

Once it was dry I laid out all the side pieces of the box and secured them in place with some masking tape across the back of them so they didn't move.

Then I used the fabulous Jewelled butterflies, the trailing foliage and the sentiment from the Jewelled butterflies set.  I stamped them out as if it was one piece of board and once the ink was dry I took them off the masking tape.  Then it was just a case of putting the box together.

The beauty of all the fabulous MDF products that Lisa and Danny bring to us is the ease of assembly, they are just wonderful.  

For the top of the box I didn't want to just leave it plain so I used Lisa's fabulous Four Point Blooms die set and cut a flower from one of Lisa's gorgeous paper pads, Bali in this case.
Then I used the Butterfly Flourish die set and cut a butterfly in the same paper then added both of these to the top of the box.
The lid handle was made from a discarded necklace and secured on the underside of the lid.

So there you go, a quick and simple way to decorate this fabulous Arty Storage Box.  
I am sure there are hundreds of different ways to do this and it would be fabulous if you have one, that you could pop it on the Facebook Group so that we can see it. 

Not a member of the group yet? 
Then please follow the link and request to join - please remember to answer the two questions or your request will be declined and we really want you to be able to join in with all the fun. 

You will see some more examples of decoration on the website, just follow the link at the top of the post.

Lisa will be back on our screens on Create & Craft, Sky 683, on Friday 22nd May at 9:45 and 15:45 and I promise you, you won't want to miss these shows - they are going to be AWESOME!!

Remember we have boards on Pinteret too - just search Lisa Horton Crafts for oodles of inspiration.