Morning all.
Well, what can I say about those fabulous new inks? Weren't they simply jaw droppingly beautiful? I can see so many of Lisa's stencils and embossing folders being adorned with those fabulous shimmering colours. Don't they play some tricks with your brain? Looking at a pink ink pad and getting a totally different colour on the paper!! AWESOME!
I've never seen anything quite like them before have you?
And then, on top of all that fabulousness Lisa goes and shows us the stunning new colours in the blending inks too. Oh my word there were some glorious colours in that new set don't you think? I have soooo many ideas going round in my head about which folders and stencils to use which colour with - mind totally blown!!
***
So today is my littlest granddaughter's 3rd birthday - I cannot believe she is 3 years old. Doesn't seem five minutes since she was born. Sadly she was born one month before all the lockdowns started so they weren't able to get out and about to see friends as had been the case with the previous children so I think my daughter struggled a bit with PND. Of course, I didn't realise because we couldn't see them either - it was only later when we were able to get together that I found out. I felt so sad for her - struggling like that and having no-one to turn to. Yes, she had friends she could talk to but there is no substitute for getting out of the house and meeting people in the flesh is there?
Still, she has done a fabulous job of bringing them up (as do all mums I know) and I am so proud of the young woman she has become and of course I am beyond proud to be a Nannie to my four wonderful grandchildren. So we're off visiting this afternoon as her Chicken Pops (that's her name for it) have all scabbed over now so she is safe to be around (for hubby).
***
Now, if you missed my live on Monday, the edited version is now available to watch on our You Tube channel. Just click the link below.
***
So, as it is Wednesday you all know that means a fabulous project for you to follow.
This week's project is brought to you by the lovely Mary Kelly.
(There are lots of pics with this project but it really does need them all so please don't be put off)
STEPPER CARD USING THE LAYERING PEONY DIES
You will need:
Peony Layering Dies
LHC Sugar Candy Blending Ink
LHC Mossland Green Blending Ink
LHC Cobblestones Blending Ink
LHC Bold Phrases Dies
LHC Blending Brushes
Embossing Folder of choice- I have used the box kit one weave
White card
Pale green card
Pale pink card
Tweezers
Glue
Trimmer
Die Cutting machine
Scoreboard and bone folder
Step 1: There are quite a few dies in the Peony Layering set. My top tip is to number the reverse of each with a permanent marker to make things clearer:) I cut all the pieces in white card and laid them out on a coloured page using the reverse of the packaging as a guide.
Step 2: I am going show how the peony layers up. I added some colour to the edges of each layer using Sugar Candy Blending ink.
Colouring layer 1
Layer 2 - Match up the shape of layer 2 to layer 1
Layer 3
Step 3: Adding layers 4-7
Layer 4
Layer 5
Layer 6
Layer 7
Step 4: Adding the last 6 small pieces - I coloured these more heavily using the Sugar Candy by adding more layers of colour. These are optional - I have added a few to create more dimension.
Step 5: Cut the vase in white card and ink the edges - I used Mossland Green and Cobblestones. Curve the vase slightly and add foam pads.
Now we can make the stepper card for our Peony Topper!!!!
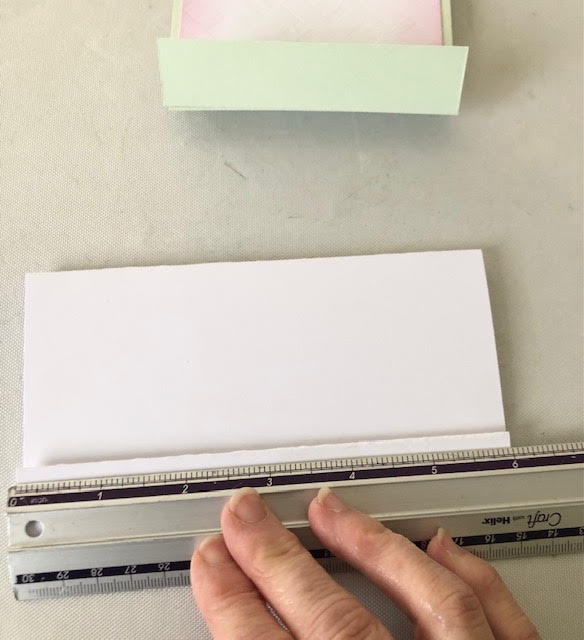
Step 6: Cut a piece of 11 x 6 inch white card - I used pale green. Score along he long side at 1, 2, 5.5, 9 and 10 inches.
Fold until you get the base stepper shape - see picture
Side view of stepper card base
Step 7: To create the centre panel of the card cut two pieces of 4 x 6 ¾ inch pale green card. On one piece score at ½ inch and fold and burnish. On the other piece score along the long edge at ½ inch and 5 7/8 inch. Fold and burnish as shown in the picture. Using the piece with the ½ tab only join the pieces together to create the shape shown in the picture.
Use the ½ tab on the right of the top piece to attach to the straight edge of the second piece
Join together to give this shape
Step 8: To add layers to the centre panel cut two pieces of 3 ¾ x 5 1/8 inch white card. Run through the embossing folder and ink the edges.
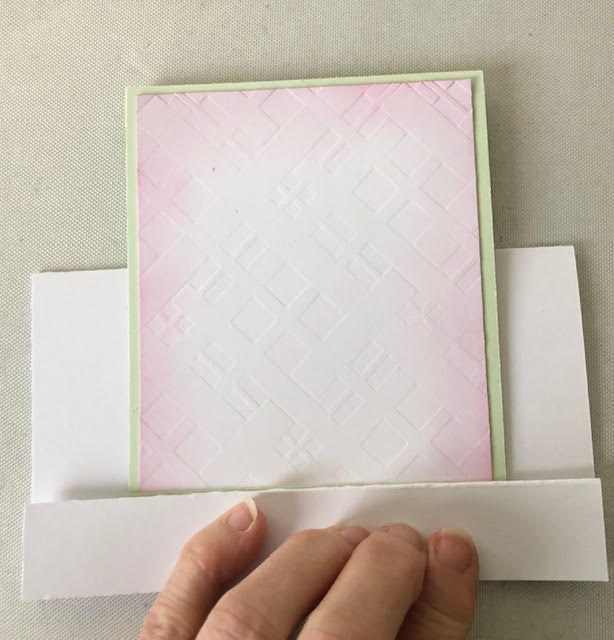
Step 9: Attach the layers to the centre panel. Fold and place on the card base. Mark the centre point - there should be 1 inch on either side.
Step 10: Add glue to the tab on the centre panel and attach as shown
Side view of centre panel attached to the base
Step 11: To add the side panels cut 4 pieces of green card to 1 x ¾ inch. Cut 4 pieces of white card to 3 x 3/4, emboss and ink edges. Attach to front and back of card.
Step 12: To decorate the front panel cut a strip of pink card to 5 ¾ x ¾ inches. Cut a white layer to 5 ½ x ½ inch. Emboss and ink the white layer and add to front of card base. Cut and add sentiment of choice.
Step 13: Add the vase and peony to the centre panel - I used foam pads for added dimension.
Your card is finished!
Please note if your card is not standing properly then follow the steps below to make a little stopper for inside:
Stopper:
Cut a piece of 4 x 4 inch card and score at every inch. Fold and burnish to give an 'M' shape - see picture. Attach to inside of card base ensuring stays flush with bottom of card
WOW! What a gorgeous project. Thank you so much Mary.
***
So, finally our words of wisdom for today.
Oh, how very true!
See you Friday lovely people.
TTFN
XXX


.jpg)
Well what can I say. The new iridescent inks look fabulous. I can't wait to see them in real life. If you know what I mean. Looking forward to the next colours of the blending and pigment inks. Along with the white and androcite. Wow we are so spoilt. Not only that but new embossing folders/stencils as well. So glad I've just been paid lol.
ReplyDeleteGlad to hear your grand daughter is better. Soon bounce back when they're little. The new feature sounds exciting. Looking forward to that. Thanks again Dawn. Karen Keen x
I know exactly what you mean Karen. Exciting times ahead. Dx
DeleteWell talk about wow factor, those inks are going to fly and they will be coming my way 🤭 grand children are a real blessing, I only have one & I love him to bits, enjoy your time today Dawn glad the little one is recovering from her chicken pops, really love Maria’s project today, these new layering dies are just fabulous xx
ReplyDeleteAren't they just stunning Val? It's actually Mary Kelly's project lovely - but yes they are fabulous dies. I'm looking forward to some kiddy time I can tell you, not seen them since Christmas. Dx
DeleteOops sorry Mary 🤦♀️ xx
DeleteSo sorry to hear about the PND, must've been extremely hard for her on top of what was a very scary time. It seems every family has a COVID story to tell. My partner's grandfather had a heart attack and was sent home with Covid which then passed onto his Gran and she endedup hospitalized herself. Glad to say both recovered but the negligence in the hospital was bad. I can say this being an nhs nurse myself. Covid certainly has tested me and how I feel about my role which I'm still working through. Mary's card is beautiful, and I definitely have these beautiful dies on my evergrowing wish list. Happy belated birthday to your lovely granddaughter. Rebecca Jayne xx
ReplyDeleteAww Dawn your poor daughter going through all that on her own bless her heart. I can imagine it would have been and felt like a very lonely time for her but fabulous that she come through it all. I do hope your granddaughter had a wonderful birthday. They’re such fun when they’re little. I’m glad her chicken pops are finally starting to show signs of healing. 😄
ReplyDeleteyour live on Monday was simply fabulous Dawn. You always have so much to show us and full of information 😘
That’s a very beautiful card of Mary’s I always say I’m going to have a go but never have as yet. One day soon I shall try something from the blogs. I haven’t used this flower as yet so maybe I could start with this one. 😜
Your words of wisdom are always so true especially this one.
I shall see you at 1pm Thursday but can only stay until 1.30
Thank you for this beautiful blog 😚
Lots of love
Connie 💜