Hi Im Claire Newcombe (aka Creative Makings) and back today with an effective stamping technique for you.
I have used one of the Butterflies from the EDGEcutz Butterfly Flourish DL stamp set, and one of the beautiful papers that are due to make their debut in Lisa's next Create and Craft Show on 28th February.
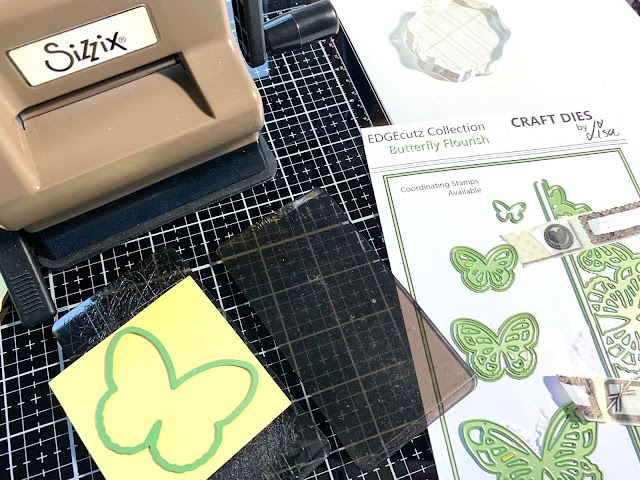
1. Start my making some masks of the largest butterfly, by die cutting some post-it notes. Use these and utilise the sticky strip to keep them in place.....however Lisa is due to release her very own reusable masking sheets, so keep an eye open for that because they are brilliant to use.
2. Here you can see I have cut 4 masks, make sure you have plenty.Its very easy to cut more as you need them. The die is from the coordinating EDGEcutz Butterfly Flourish die set
3. Begin by stamping in the centre of the page and work your way out towards the edges, where you will eventually begin stamping off the page.
Cover each butterfly as you stamp it, so that you can stamp the next butterfly and overlap.
Only remove the sticky mask when you are not stamping next to that image.
4. I am stamping onto Lisa's own design papers (coming soon) because I loved the dreamy effect the colours made - it meant that I didn't need to colour the butterflies, only highlight them.
This technique could easily be done on plain stamping card if you wanted to create a page for yourself to sit and colour.
5. Die cut a shape from the centre, mat & layer onto complimentary cardstock and replace back into the centre on 3D foam pads.
Mat the whole sheet onto black card before fixing to the front of a card blank.
6. I have highlighted the central panel by adding some shading to the butterflies with colour pencils. You could add glitter or even glossy accents.
Ive also die cut one of the detailed butterflies (from the EDGEcutz Butterfly Flourish die set) as a three 3D element along with the sentiment.
I can't wait for you to see the beautiful papers that Lisa has designed. Their quality is second to none, and take ink brilliantly...whether its stamping, shading or blending.
Thanks so much for popping by.
Remember to share your makes with us over in our friendly crafty Facebook group.


This is a stunning project. I can’t wait for Lisa to bring out the masking papers. Xx
ReplyDelete