Morning all.
Don't forget that Lisa is on Create and Craft later today at 4pm with the fabulous new layering stencils that you have all been asking for. It's going to be a crazy fast show I think so get in early if you can. Just saying. Lol
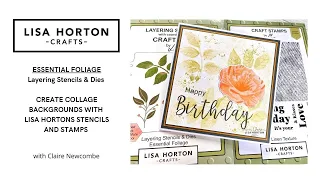
If you didn't manage to catch Claire's live yesterday here is a link for you to be able to watch at your leisure. It was a fab live with lots of hints and tips for your cardmaking. Well worth a watch.
***
Another Wednesday so that means another fabulous project for you.
This project is brought to you by the lovely Mary Kelly.
Mary has some fabulous ideas for her cards and this one is no exception.
So I'll let Mary tell you how to go about it!
This is a very popular card style.
I was inspired by several online
tutorials including Sam Calcott.

LHC Star slim line Embossing Folder
LHC Sentiment Insert Trio
LHC Scalloped nested circles
Card of choice 12 x 12 – 3 colours
(300gsm might be a little thick so something lighter)
Glue
Sequins
Acetate
Foam tape
Die cutting machine
Double sided tape – red liner is good
Scoreboard
Scoring tool
Guillotine/Trimmer
Step 1:
Cut two pieces of card 12 x 6 inches. Score each piece on
the long side at 3/6/9 inches. One of these will form the card base.

Step 2:
Score the other piece as shown to create two crosses. Use your scoreboard or a ruler and scoring tool to make the crosses. Fold and score the score lines as shown. Note some score lines are mountains – they come forward and some are valleys – they project backwards. Trim approximately 1/8inch of each side to ensure this piece will fit into your base card, Check by laying this section into the base.

Step 3:
To decorate the front cut two panels of card 3 ¾ x 5 ¾. To decorate all the internal triangles cut two squares 3 ¾ x 3 ¾ and then cut these in half for the larger sections. Cut 4 squares 2 ¾ x 2 ¾ and then cut these in half for the smaller triangles. Emboss all these section and attach.

Step 4:
Lay the sentiment circle down and add the larger circle – I have used the fifth largest circle from the scalloped circle set but any circle die of approximately 3 ½ inches should work. Die cut. Also cut a piece of acetate using the larger circle. Attach the acetate to the reverse of the sentiment using red liner tape. Add the foam tape to the reverse.


Step 5:
Cut a circle in white card using the circle die – this will be the back of the shaker. Place your sequin in the centre of the circle and after removing the backing of the foam tape add the sentiment circle. Press to ensure fully attached
.

Step 6:
To make the sentiment circle pop you need a little spring. To make this cut a piece of card 1 x 3 inches. Score along the long side at ½ / 1/2/ 2 ½ . Fold as shown.


Step 7:
Attach the pop up section to the base by gluing the outer triangles in place. Add the spring to the centre fold – ensure it straddles the centre score line. Attach the shaker topper.

Brilliant blog tutorial Mary. Thank you Su x
ReplyDeleteThank you Dawn for this lovely blog.
ReplyDeleteI for one shall be watching the shows with our lovely Lisa
I would love to have a go at Mary’s card as soon as I have a minute to do so. Thank you Mary for the inspiration. I’d love to
have a go at them all really lol
My orders in and I can sit back and watch the shows to which I’m looking forward to.
See you at the live tomorrow Dawn x
Lots of love
Connie 💜
Great project and will be watching Lisa later! Su Robson
ReplyDelete